 Pardon the mess! The Support Center is undergoing construction.
 ![]()

January 18 2022
Miss Honey's library got twenty new Google Chromebooks to benefit students and teachers. It’s easy to use Chromebooks in your library with Alexandria. You can use them as stations in your library, or set them up as regular circulating items for your teachers, your patrons, or both. Let's review how you can use Alexandria to properly catalog these, along with other equipment items like projectors.

Setting up policies
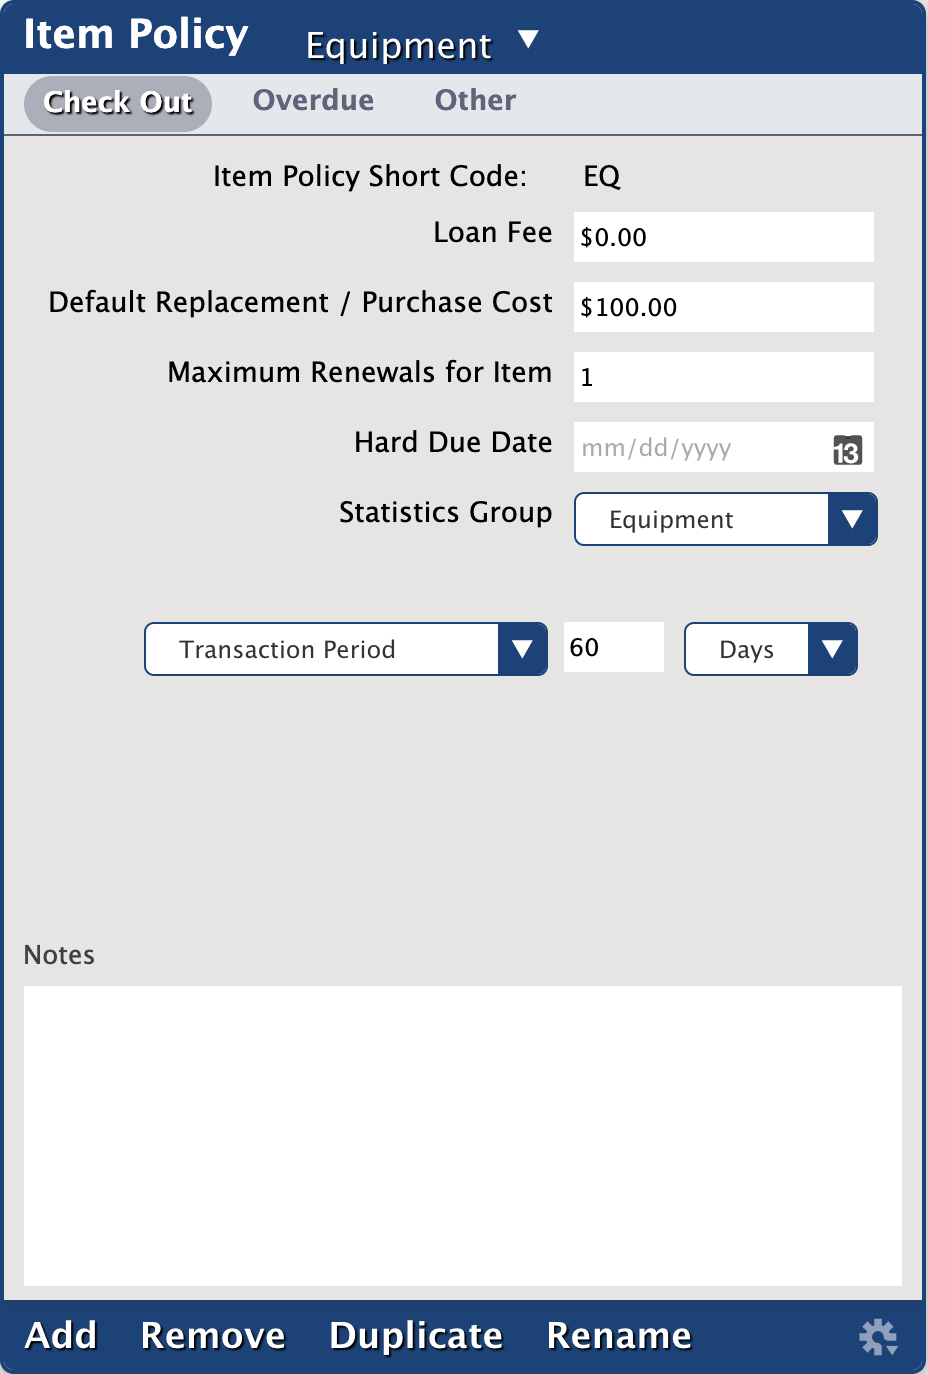
One policy or multiple policies—Do different types of equipment have different check-out periods? Would it be useful to have detailed statistics for projectors, TV carts, and Chromebooks individually? If so, you will want multiple policies. On the other hand, if all your equipment checks out for similar periods, and you only want general statistics, you can create just one policy for Equipment.
Teachers or rooms—Sometimes it makes more sense to check out projectors etc. to a room rather than to a teacher. If so, you will want to create a policy for Rooms, then create individual ‘patron’ records for each room.
Exceptions—The best way to handle item policies is to set them as they apply to the majority of your patrons, then create exceptions. So if your students can’t check out equipment, set your equipment policies to have No Loan Period, then create exceptions for the patron types who can check out equipment.*
Hard Due Dates—Rather than checking an item out for 2 weeks, you could set the Transaction Period for a number of months (or 9999 days) and instead set a Hard Due Date when these types of items are due. For example, it may be more useful if you check out your projectors to classrooms for the entire school year, but keep in mind you will need to set these dates every year.
Item Management—Create titles for the types of equipment you are using (e.g. Overheads), and add copies. These copies can include their specific Serial Numbers. Include a copy number as part of the call number to make inventory easier, e.g. OH-1 for the first Overhead, OH-2 for the second. The overheads can then be shelved in call number order, making it easy to see which ones are missing or out.
*Create an exception for teachers to check out equipment:
- In Preferences, go to the Policies area.
- On the Patron Policy side, bring up the Teachers policy.
- On the Item Policy side, bring up the Equipment policy.
- Click the Exceptions tab at the top. It will turn red, indicating you are in Exceptions mode.
- On the Item Policy side, under Check Out, change the No Loan Period drop-down to Transaction Period.
- Fill in the appropriate number of days.
- Save the preference.
- Click on Exceptions again to exit the mode.
Read this article for more info about Policy Exceptions.
Adding items manually
- Open Items Management.
- Add a new item with the plus (+) icon.
- Hit Enter on your keyboard or click Search.
- Change the title to Chromebook (or whatever type of item you are adding).
- Change the policy (e.g. Equipment, Electric Device).
- Add copies.
- If necessary, enter the Serial # for each Chromebook in the Copy Information tab.
- Save the record.
Adding items using an import file
You can add equipment with an import file that has all of the info you need, such as title, medium, barcode, serial number, purchase/replacement cost, etc. Usually this file would come from your technology department.
Instead of creating hundreds of separate titles, you may want a single title for that equipment with multiple copies.
You can easily ensure the copies are added under one title:
- Include title, author, and medium in the file
- For example, Title: Chromebook 2021-22 (indicate the school year); Author: Chromebook (a simplified version of the title, just to help accurate matching—you could also use the manufacturer); and Medium: Equipment. All that matters is that the title, author, and medium in the import file match for all the titles you want copies added to.
- Change the Title Update Matching setting in Imports to Title & Author & Medium.
- Use the Import Setting of Add or Update Titles & Copies.
Labels
Tired of students picking the labels off the Chromebooks? We also sell label protectors that can help keep the labels on: Label Protectors Package - 3" X 1 1/4" (1000 qty)
Reach out to our Sales team for more info on label protectors:
1-800-347-6439 (U.S. & Canada)
1-801-973-7277 (Worldwide)
sales@goalexandria.com
![]() Tell us how we're doing! Fill out our Support Center Content Feedback to let us know how we can improve our Support Center.
Tell us how we're doing! Fill out our Support Center Content Feedback to let us know how we can improve our Support Center.
Recent Posts
Blog Posts
-
Winter storms–recompute due dates
created by
Jan 23, 2024
-
How to add reports in the new beta–you beta be trying it!
created by
Jan 16, 2024
-
Site-specific eBooks
created by
Jan 10, 2024
-
User-friendly–optimize your setup
created by
Dec 01, 2023
-
The gift of keyboard shortcuts
created by
Nov 30, 2023
-
Builder: customize your search
created by
Nov 21, 2023
-
Maps makeover
created by
Nov 13, 2023
-
Making search strings using advanced search
created by
Nov 01, 2023
-
Popular items: creating explore panes
created by
Oct 25, 2023
-
Creating a slideshow for spooky season–or any reason!
created by
Oct 17, 2023
Want more tips?
Sign up for the emails!
How helpful was this page?
Add Comment