| Content Column |
|---|
| | Content Block |
|---|
| 
The new hub for all our Researcher builders–bulletin boards, explore builder, maps, and reviews. Coming soon as part of our Alexandria Makeover!
|
| Content Block |
|---|
| DisplaySelect a custom Explore Pane that will be used for your Researcher landing page, and set the style of your Researcher using the Style menus below. 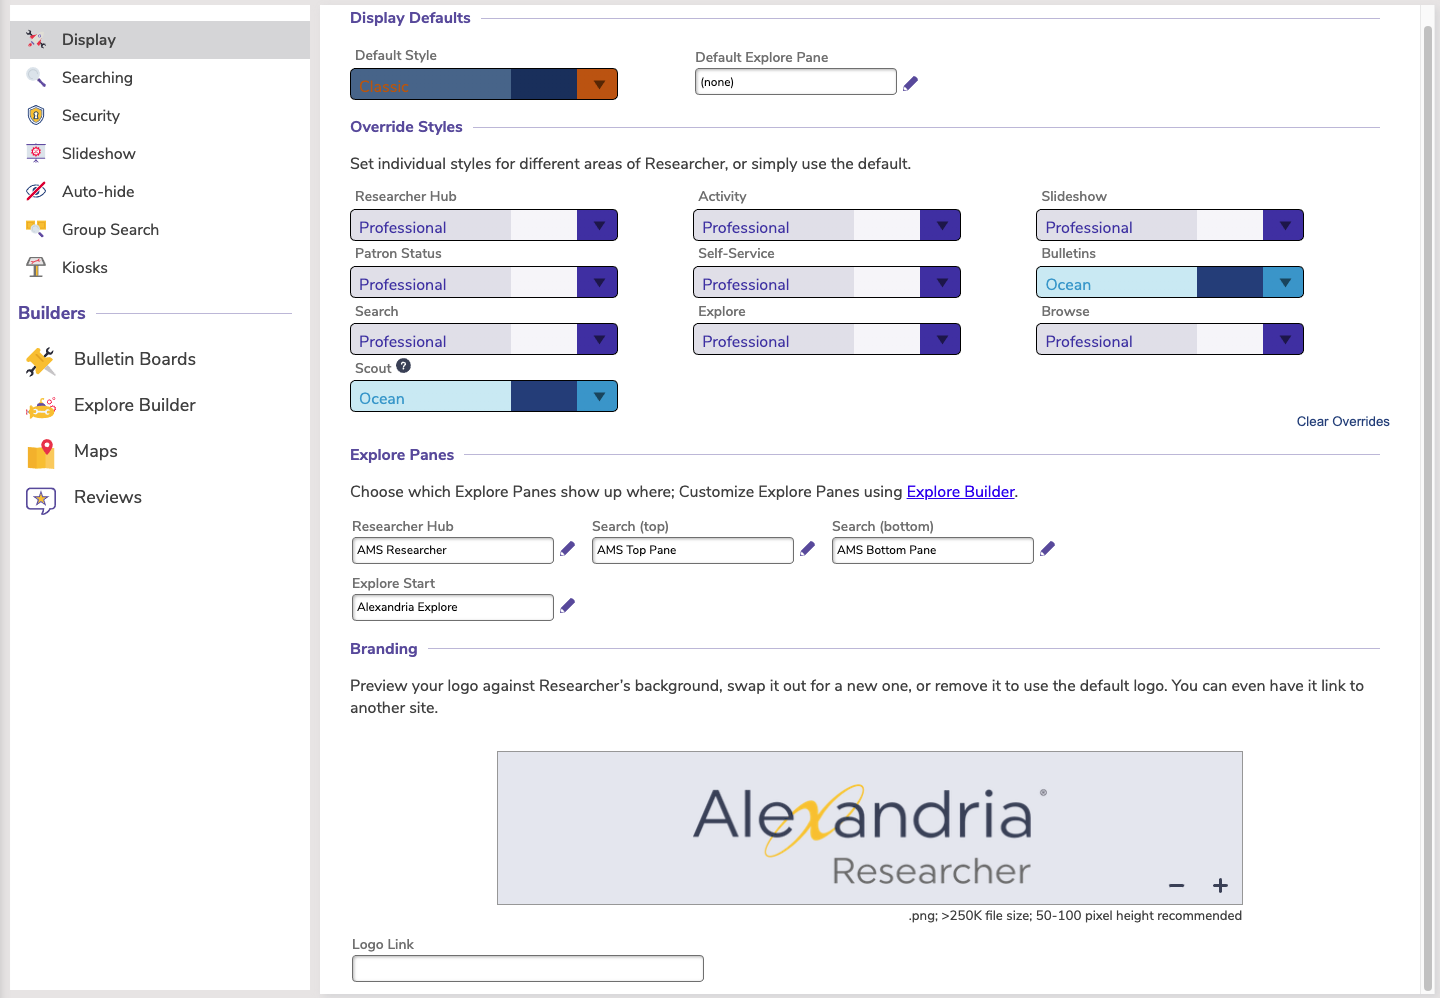
Display Defaults/ Override Styles You can select a default design, or customize the design of each area of your researcher. NEW! All styles now available for Scout! Classic
| Ocean
| Mosaic
| Professional
| Seafoam
| Bubbly Ocean (Scout)
|
|
| Content Block |
|---|
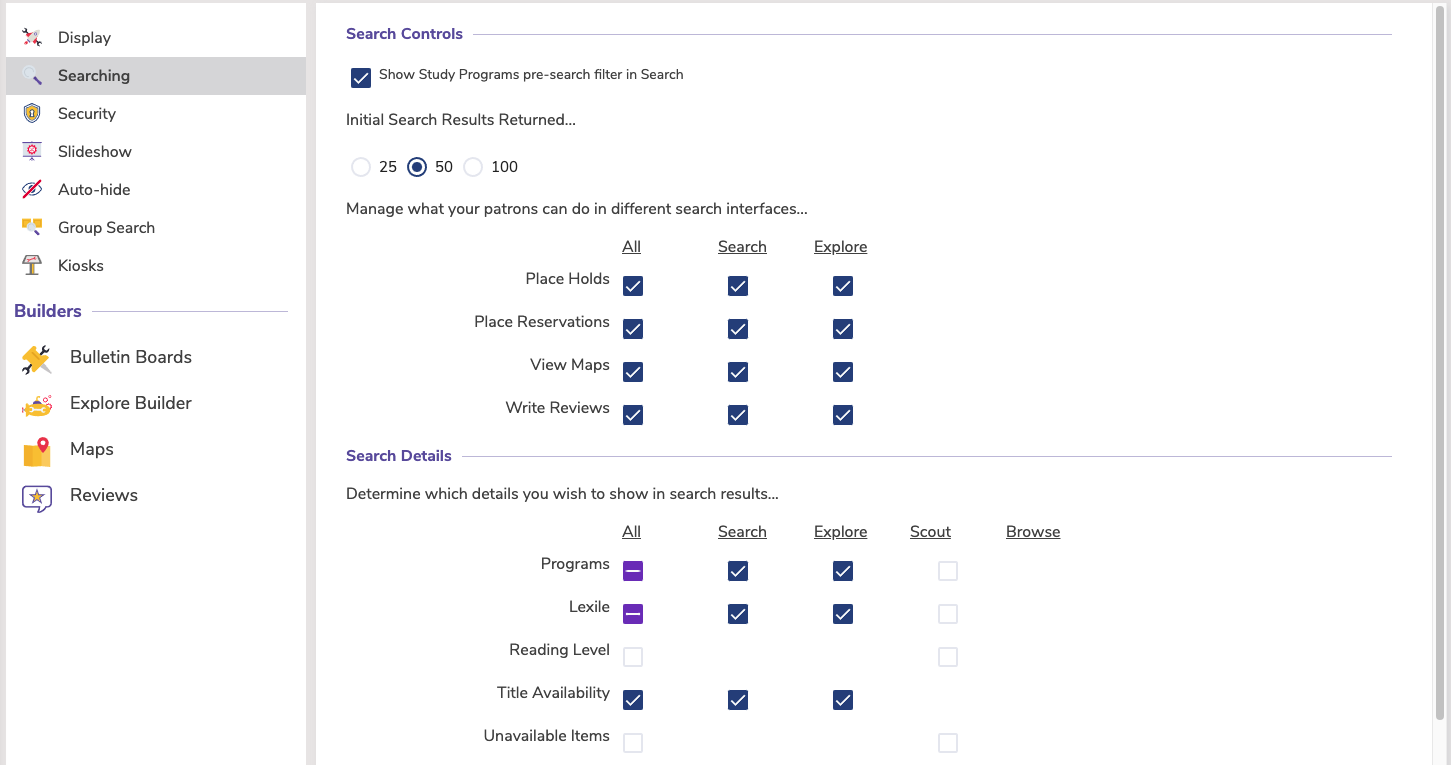
| Search Controls Edit your search controls, including managing what your patrons can do in different search interfaces. - Enable Reviews. When checked, patrons are allowed to review items in your collection by clicking the five-star rating located item Results Details. When this preferences is not checked, the rating stars disappear—as does the ability to review items.
- Show Hold Controls. This enables or disables the Place Hold icon that appears in the Results Details control bar when patrons are logged in. This preference must be enabled in order for patrons to place hold requests on items from the Search interface.
- Show Reservation Controls. This enables or disables the Place Reservation icon that appears in the Results Details control bar when patrons are logged in. This preference must be enabled in order for patrons to request reservations from the Search interface.
- Show Map Icon. This enables or disables the Maps icon that appears in the Results Details control bar when patrons are logged in. If this preference is disabled, patrons will be unable to see maps to specified titles from the Search interface.
- Show Call Numbers. This preference determines whether the title call number will appear above the title name in your brief and/or expanded search results.
- Show Lexile. This preference determines whether the Lexile Score will appear in your brief and/or expanded search results.
- Show Study Program. This preference determines whether your preferred Study Program information will appear in brief and/or expanded search results. The study program shown is determined by the Preferred Study Program setting. Your study program information must be entered correctly in the 521 ( ; Fountas & Pinnell) or 526 ( ; Accelerated Reader and Reading Counts) tags; applicable study program information is generally stored in the 526_c tag. Reading level information can be accessed and modified in the Study Program subtab of Items Management. This preference ignores Lexile information; that value is displayed independently, determined by the Show Lexile preference (above).
- Show Title Availability. When checked, this preference will show whether or not the items returned in a Search are available to be check out.
Search Details - Enable Item Details. If enabled, clicking the title name (e.g. “The Catcher in the Rye”) in Search Results allows you to view Full Details for the selected item. Additionally, checking this box enables or disables the remainder of the Full Details preference settings described below.
- Show MARC Tag 000-009 Data. This preference determines whether MARC tags 0-10 are shown in the Full Details dialog.
- Show MARC Tag 900-999 Data. This preference determines whether MARC tags 900-999 are shown in the Full Details dialog.
- Show View Full MARC Record. This preference determines whether the View Full MARC Record link appears in the bottom-left corner of the Full Details dialog. When the View Full MARC Record link is clicked, it will open a new browser tab containing a text-only version of the title record in MARC format.
- Show Link to Amazon.com. This preference determines whether the link to Amazon.com appears in the bottom-right corner of the Full Details dialog. Clicking on the Amazon graphic link will open Amazon.com in a new browser tab with the closest possible match based on the item's ISBN/ISSN. Additionally, the Amazon link will not appear if the title record is lacking a valid ISBN/ISSN.
Default Program Choose which program you want to highlight in search results. Override Program Set individual programs to highlight in different areas of Researcher, or simply use the default.
|
| Content Block |
|---|
| Security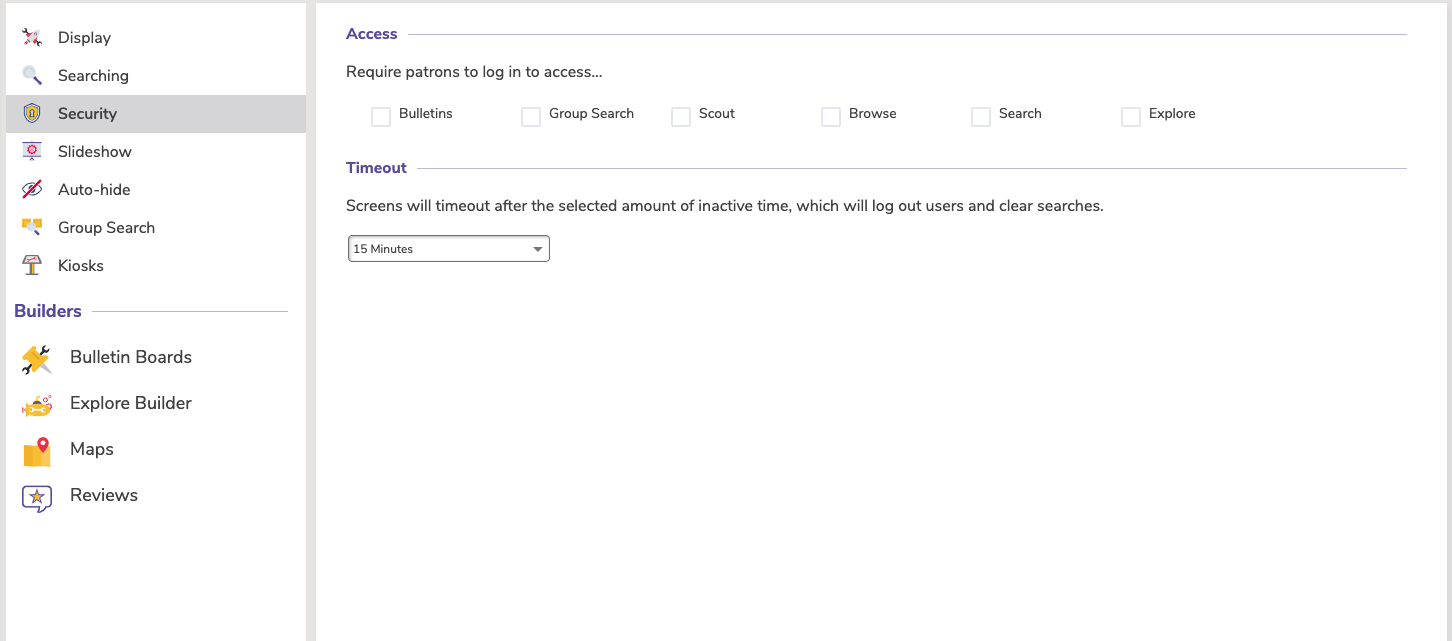
Access Choose which areas of Researcher require patrons to log in. Timeout Screens will timeout after the selected amount of inactive time, which logs out users and clears searches.
|
| Content Block |
|---|
| SlideshowSlideshow gives you a fun way to dynamically display any list of titles in your catalog for educational or promotional purposes. You can limit the Slideshow to display on a television or projector that does not allow user input or to a dedicated display that does allow user input—such as a tablet device on a display table. Additionally, one or several Slideshow URL's can be built and saved! 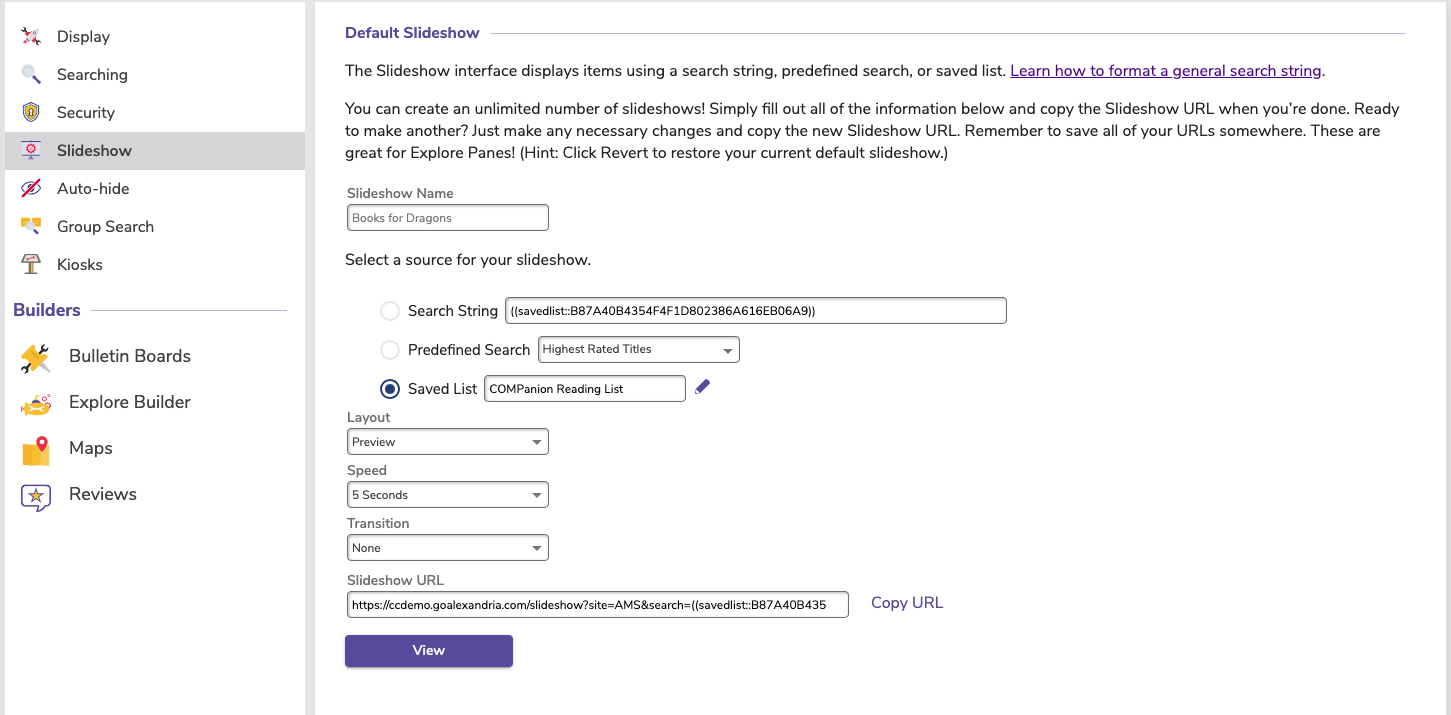
Enter the name of your slideshow here. The name will be shown at the top of the slideshow. SearchThis field determines what items are displayed in Slideshow. Enter a single search term (like Harry Potter) to perform a relevancy-based Smart Search, or enter a more complicated search string. You can even paste a Search URL in this field, and Slideshow will search for and extract the search string. The possibilities are endless! Read Search Strings for more information on using search strings and building syntax. Predefined SearchesClick to select and apply some of our commonly-used search strings without having to understand the syntax. Recently Added Titles, Highest Rated Titles, and Titles With Awards are just a few of your available options. You can also choose from one of your public saved lists. | Warning |
|---|
Slideshows will only display the first 100 items in the search results or saved list. |
LayoutChoose between a Split or Preview layout. If you open a slideshow on a mobile phone, it will default to the mobile layout. - Split. The current slide displays cover art on the left and item details on the right. Click the arrow on the left to go back a slide, and click the arrow on the right to move to the next slide.
- Preview. A carousel containing the items in your list is displayed below the current slide.
- Mobile. The current slide displays item details only, and a carousel containing cover art for other items in your list is displayed below.
SpeedSet the duration of the slide interval in seconds. The default is 5 seconds, but it can go as high as 60 seconds. TransitionChoose the type of transition: Drawer, Fade, Ken Burns, or Push. StyleChoose one of five styles: Bubbly Ocean, Classic, Seafoam, Professional, or Mosaic. View SlideshowPreview the slideshow interface in a new browser tab to make sure it's working as expected.
|
| Content Block |
|---|
| Auto-hideAuto-Hide allows allows you to hide titles that do not have any physical copies in circulation from your Explore, Scout, Search, and Slideshow results. Electronic resources will not be hidden. This can be helpful when adding title record information in advance of incoming copies.
Here are a few things you should know before you enable this preference: - Titles will only be hidden if all copies are checked out to a system patron you've chosen to hide from search results, but they do not have to be checked out to the same system patron. For example:
- The title in question has four copies, all of which are checked out to a system patron: two are Lost, one is In Processing, and one is On Repair.
- The title will be hidden if you've opted to hide Lost, In Processing, and On Repair items.
- The title will be shown if you've opted to hide Lost and On Repair but not In Processing.
- Title records that have the Don't Show in Researcher setting checked are hidden from search results, regardless of their status and your Auto-Hide selections.
Enable Auto-HideCheck this box to automatically hide titles that have zero copies and are not electronic resources. You must check this box to enable any sort of auto-hide, including the "Also Hide Title..." options below. Also Hide Title When All Copies Are Some Combination of...These options allow you to mix and match which titles to automatically hide from your search results. - Lost
- Discarded
- Library Use
- On Repair
- On Order
- Archived
- In Processing
- Unknown
|
| Content Block |
|---|
| Group SearchGroup Search is used for Distributed Catalogs to create search groups that store Alexandria Data Station DNS or IP addresses. Once properly configured, you can search these addresses from the Group Search interface. You may add as many search groups as you need to manage your Alexandria libraries and/or collections. Generally, most create an individual search group for each supplementary site. However, additional search groups may be created instead for more extensive searches. For example, you can create custom search groups that contain Data Stations according to geographical regions (e.g. Northwest Quadrant) or levels (i.e. Elementary Schools) in a school district. 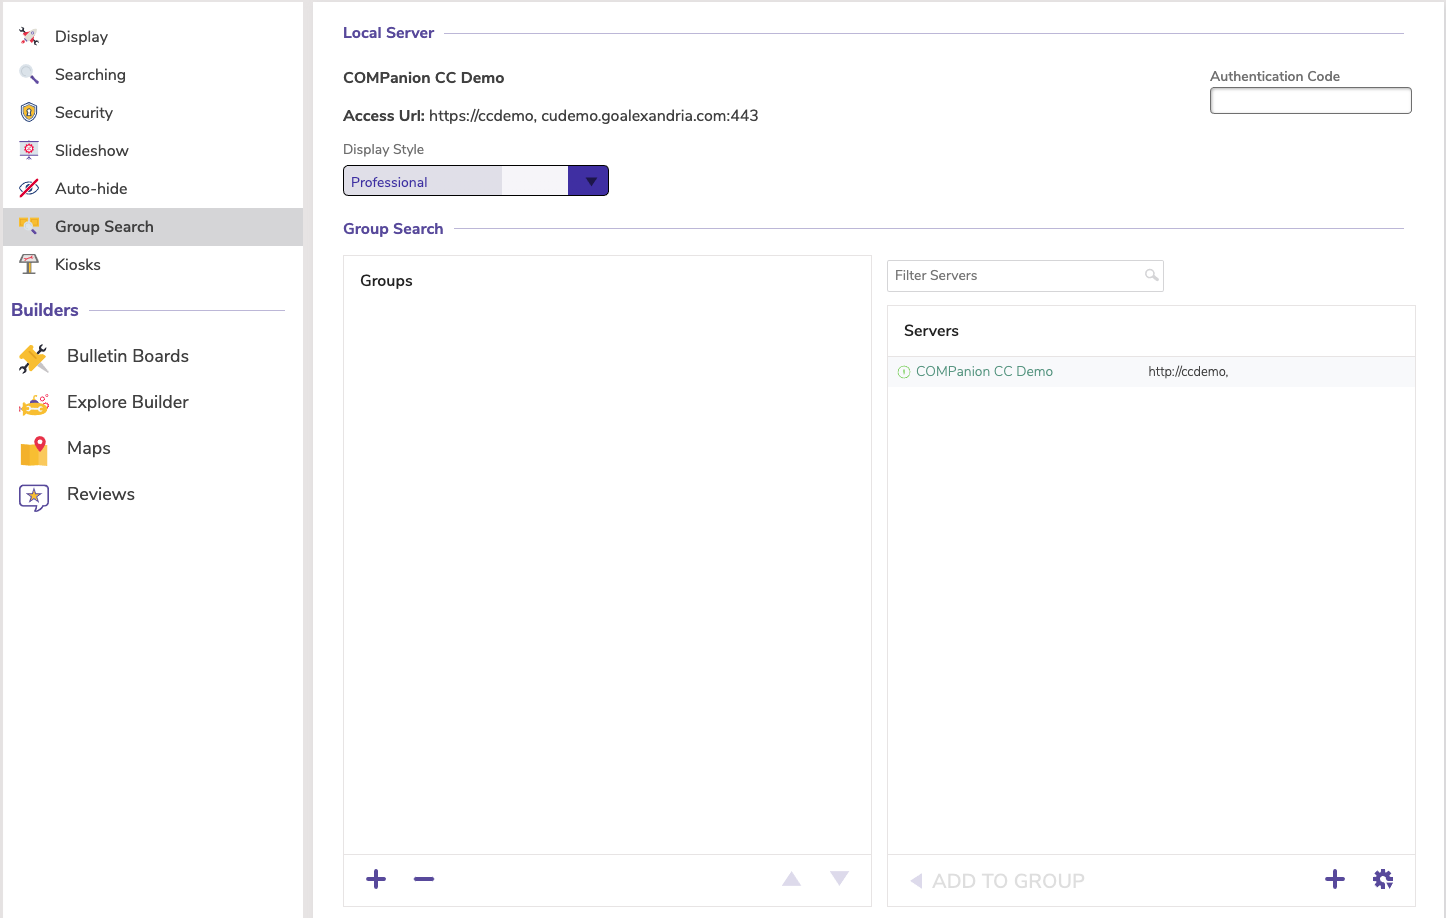
Local Server - Library Name. This non-editable field is pulled from your registration information.
- Access URL. This non-editable field is pulled from the local site’s DNS (domain name) or IP address.
- Authentication Code. You must provide an authentication code here in order for other Alexandria users to connect to your Alexandria database; if left blank, outside databases will be unable to connect.
Group Search The left-hand side of the Group Search preferences contains the Groups list, where all your search groups are displayed in the order which they were created. The Data Stations list is essentially a collection of remote Alexandria Data Stations that you can Add or Remove. The area situated below the Groups and Data Stations lists contains tools that useful for adding, removing, rearranging, or testing both search groups and Data Stations.  Add Search Group Add Search Group
Add a new search group to the Groups pane. These can later be accessed in the Researcher's Group Search interface (/groupsearch). Keep in mind that Group Names must be unique.  Remove Search Group Remove Search Group
Remove an existing search group and all of the associated Data Stations. Be absolutely positive that you want to remove the group before clicking Remove; it cannot be undone.   Move Up/Down Move Up/Down
These controls organize how Data Stations are arranged in a group, which affects the order in which they are searched by the Group Search interface (/groupsearch) when their principal search group is selected. New Data Stations are always added to the bottom of the selected groups list.  Add to Group Add to Group
Copy a Data Station and add it to the selected search group in the Groups pane. The  Actions dropdown menu at the bottom of the Data Stations list contains tools that useful for adding, removing, or testing remote Alexandria Data Stations. Actions dropdown menu at the bottom of the Data Stations list contains tools that useful for adding, removing, or testing remote Alexandria Data Stations. Add Data StationAdd a new Alexandria Data Station. Each Data Station acts as its own local server with an individual site name and access URL (i.e. DNS or IP address). Enter the DNS or IP address of the remote Data Station you would like to add. Each Data Station requires an authentication code to connect. | Note |
|---|
The browser protocol—such as https://—must be included in the access URL if it's required by the host (this applies to all Cloud-Hosted users). |
Edit Data StationEdit an existing Data Station from the Data Stations list. Remove Data StationRemove the currently selected Data Station from the Data Stations list. Test Selected Data StationThis verifies that you can establish a connection with the selected server and then refreshes and updates the remote Data Station's information. |
| Content Block |
|---|
| Kiosks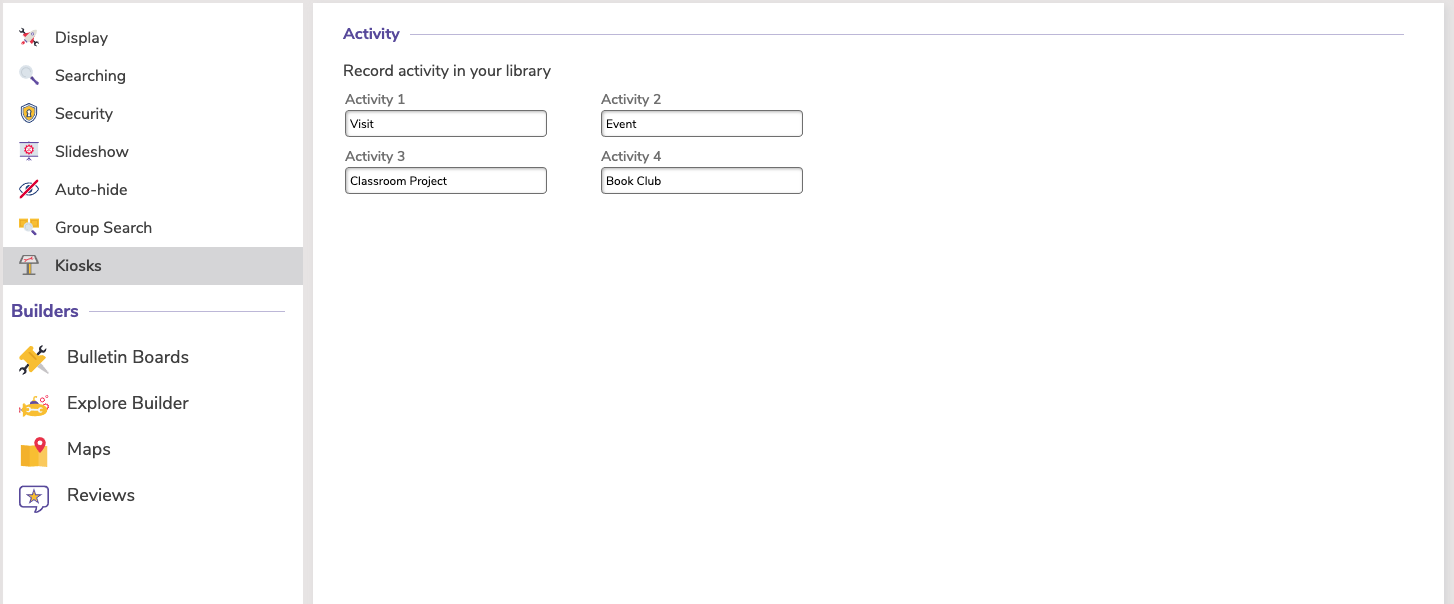
Activity Activity is an unattended kiosk interface that allows you to keep count of patron visits, volunteers, and event attendees. Information gathered from Activity can be presented to administrators or funding sources for planning and budgeting purposes. | Activity 1 | Defaults to "Visit." Character limit of 30. Shows on top left button. | | Activity 2 | Defaults to "Event." Character limit of 30. Shows on top right button. | | Activity 3 | Defaults to "Classroom Project." Character limit of 30. Shows on bottom left button. | | Activity 4 | Defaults to "Book Club." Character limit of 30. Shows on bottom right button. |
| Note |
|---|
In Activity, the activity text will truncate with an ellipsis ("...") if it is too long. |
|
|
|
 Pardon the mess! The Support Center is undergoing construction.