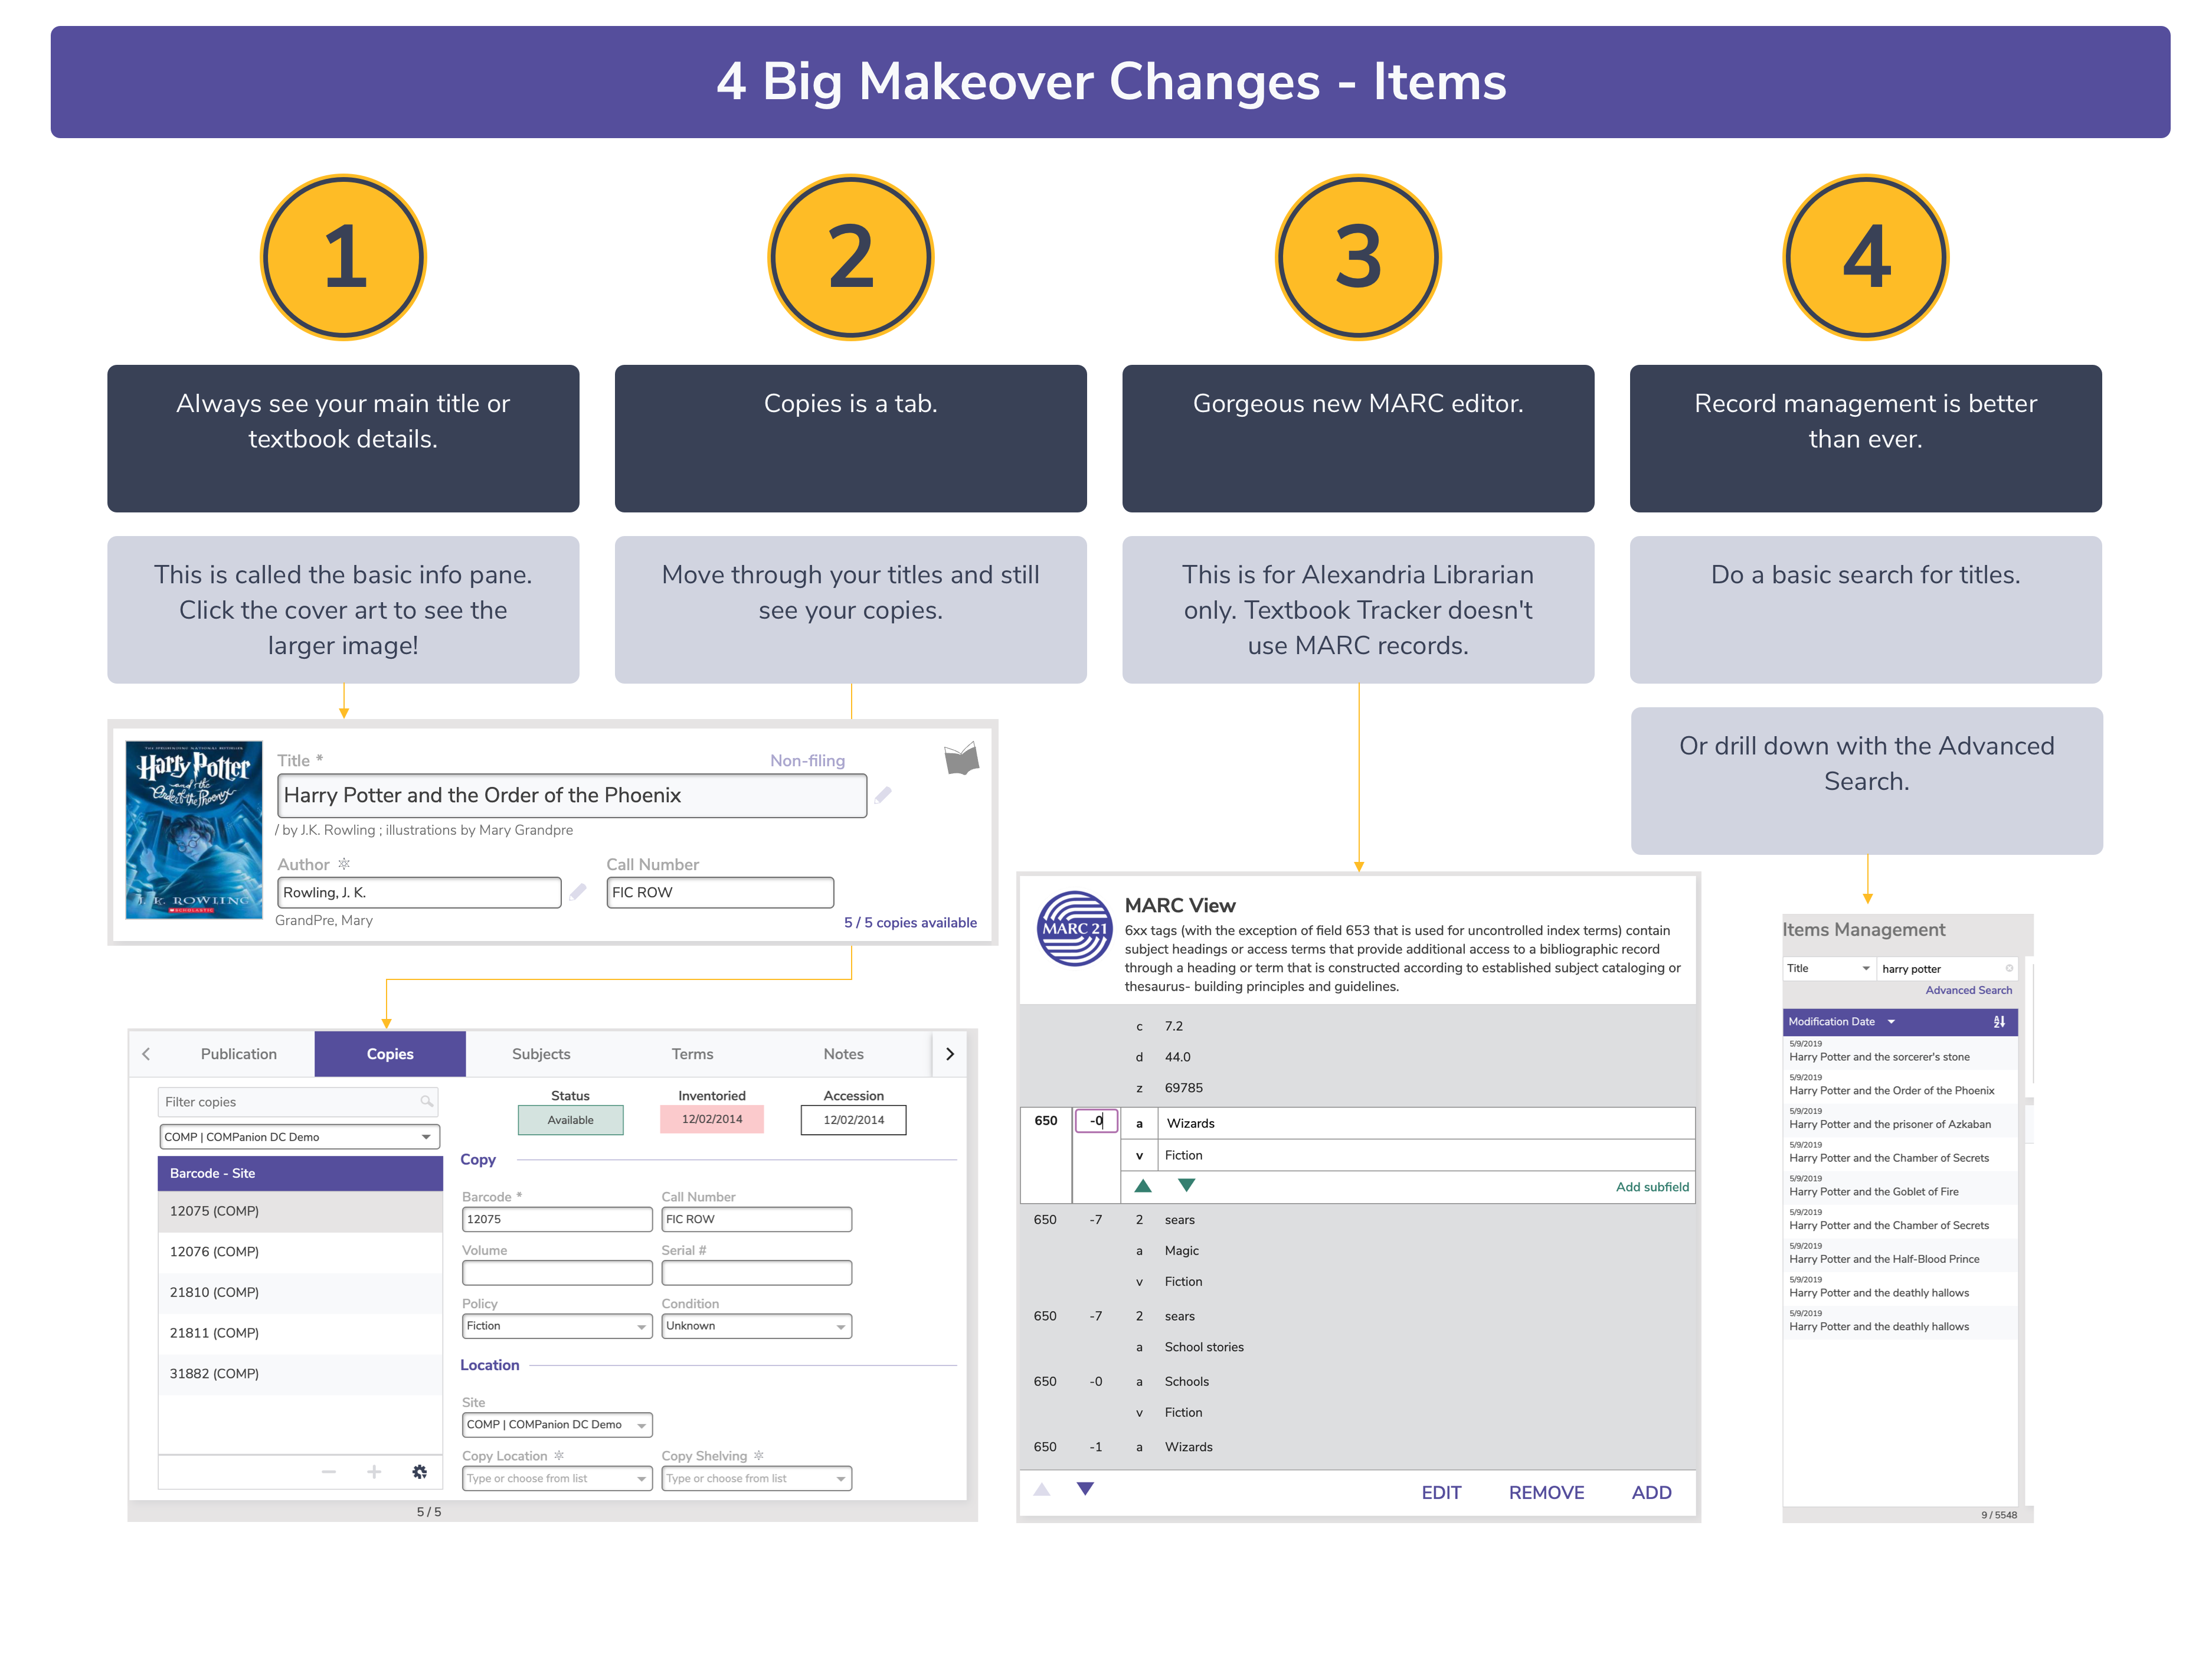
Items ManagementItems Management is where you add, view, duplicate, move, and modify standard information about the items in your database. - Title Records contain general information about the item that is the same for every copy. This includes author, publisher, subjects, Lexile, and more. Each title can have one or more copies.
- Copy Records represent each individual copy of the title in your collection; each copy is assigned an individual barcode number.
- Items may refer to either or both.
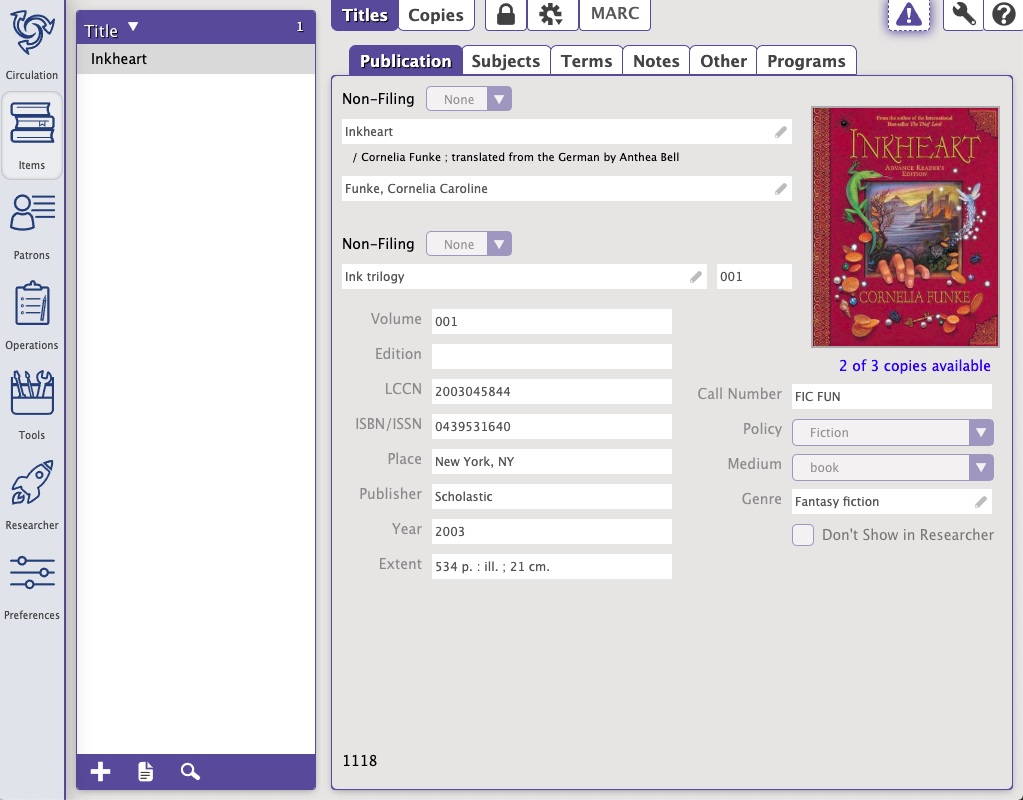
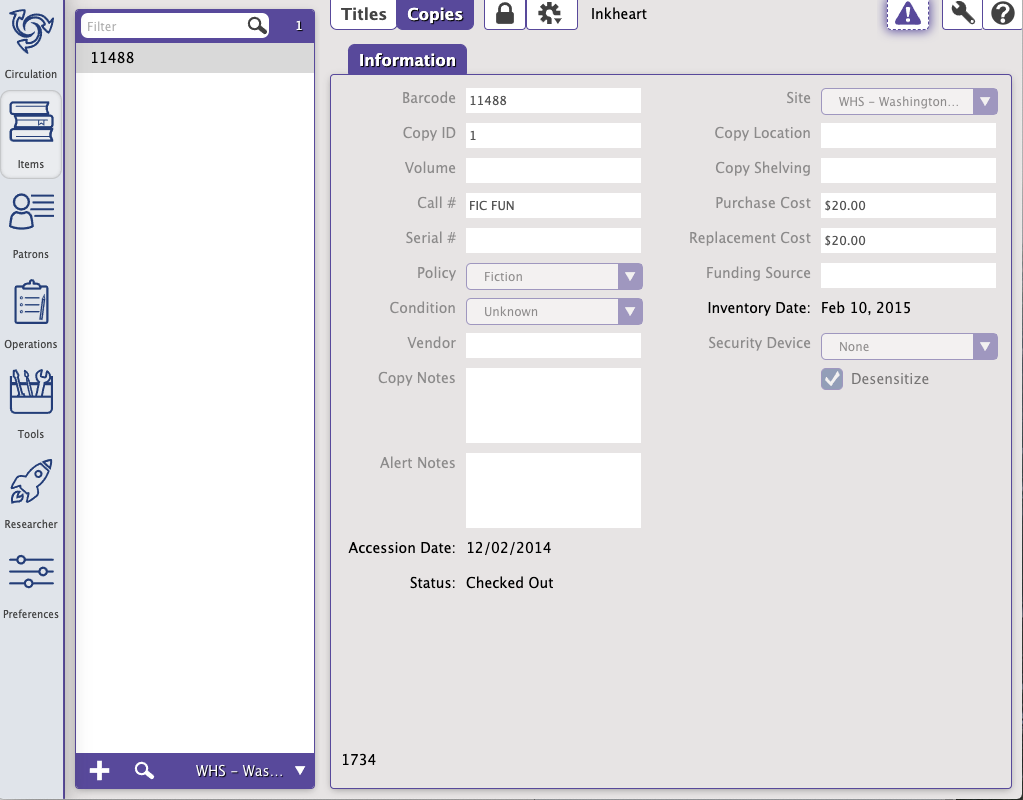
Supply only the information you need for title and copy records; this allows you to provide consistency in the content, look, and feel of your collection. The title record subtabs enable you to input the most common information needed to catalog a title. If you're cataloging a book, you can find much of the information you'll need on the Publication tab. Because Items Management only offers the most recognizable of fields, you can also use the MARC View editor to take full advantage of the detail and flexibility of the MARC standard. In Alexandria, items can be books, eBooks, music, movies, electronic resources, photographs, periodicals, filmstrips, newspapers, magazines, or any other form of media—essentially anything that circulates in your collection. The information stored in individual item records is cross-referenced by Researcher and is used in areas such as reports, utilities, exports, imports, inventory, and policies. With Alexandria's Centralized Catalog, all libraries share title information, thus, every single library benefits from the changes you make. Depending on your security permissions, you are allowed to view and edit item records for every collection in your district. NavigationThe Items Management module consists of two distinct areas: the Records List on the left, and the Current Record pane on the right. Go to the Current Item pane to switch between Titles and Copies, then click the padlock to unlock the record for editing.
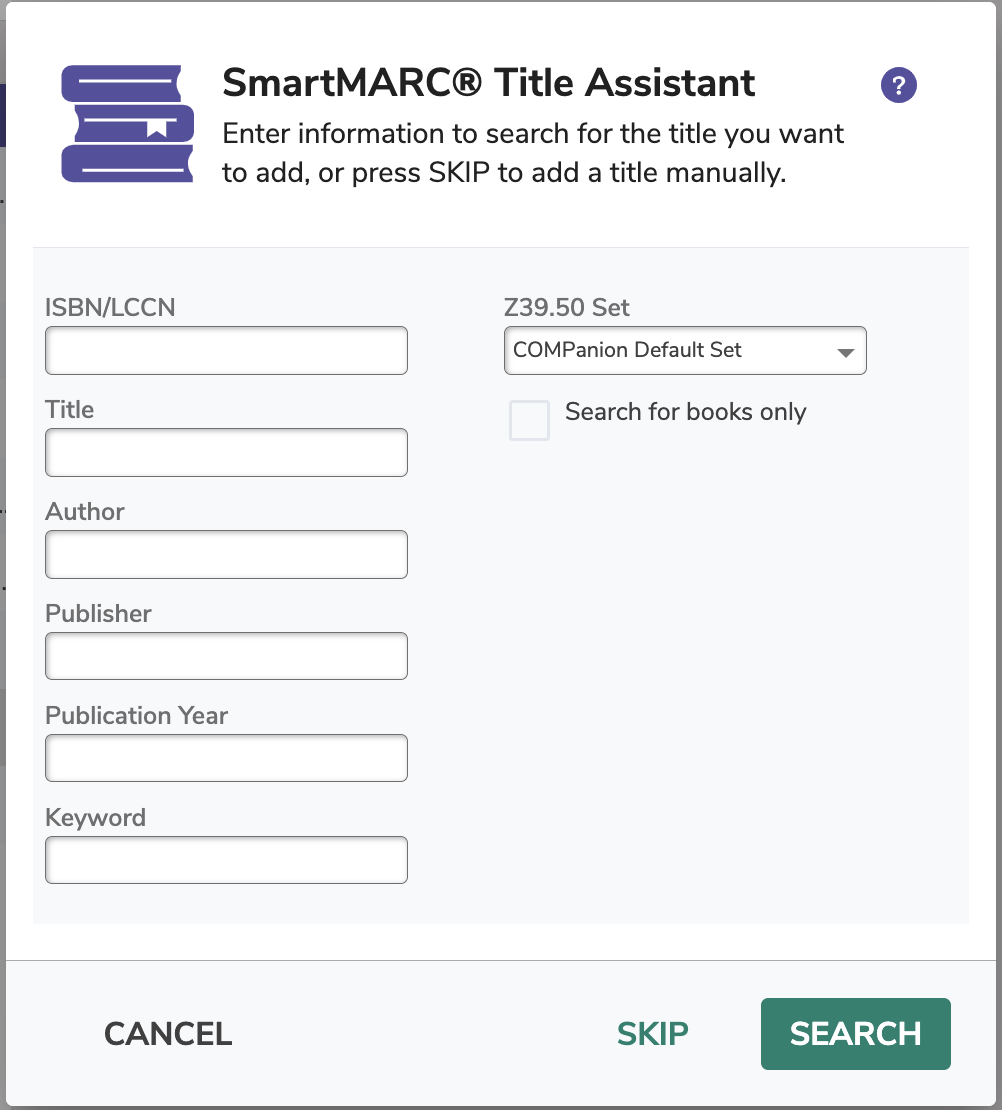
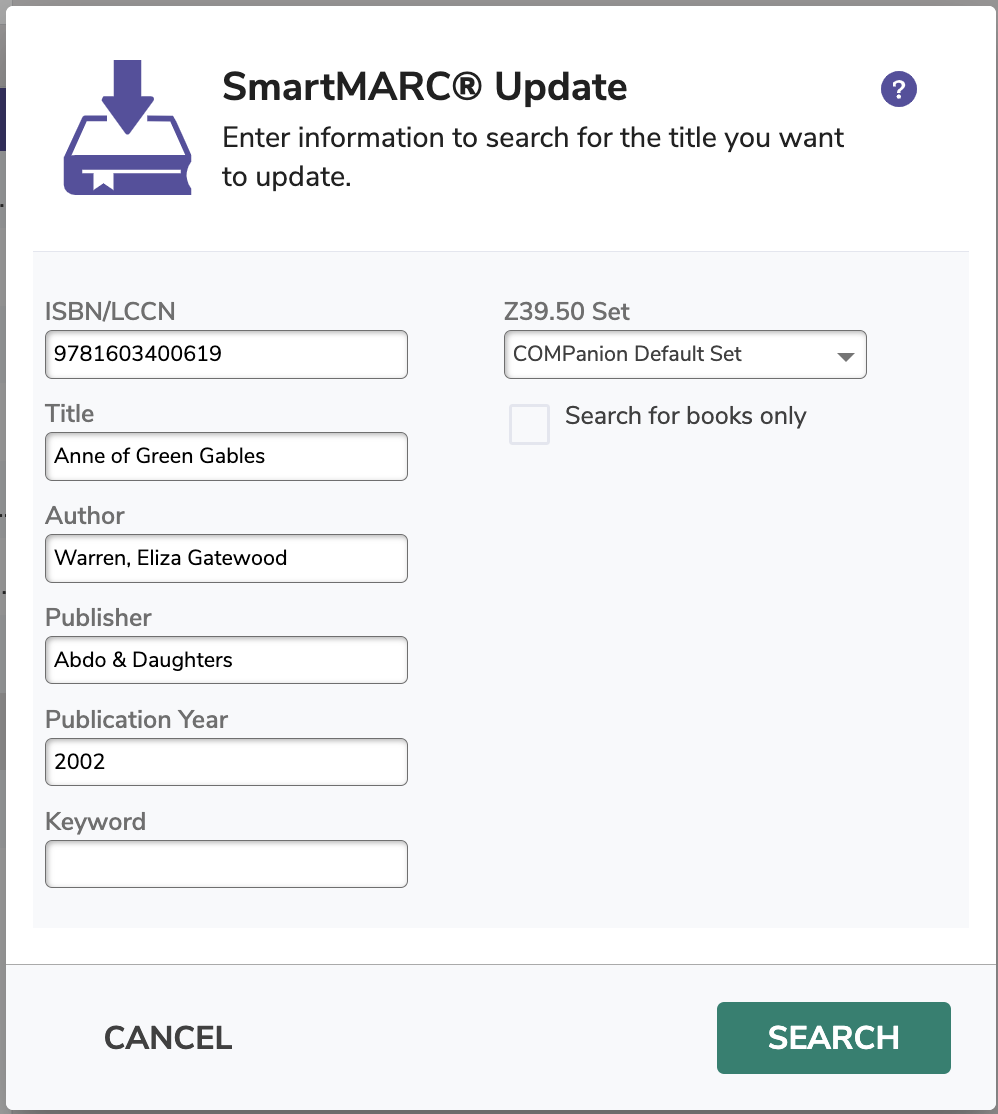
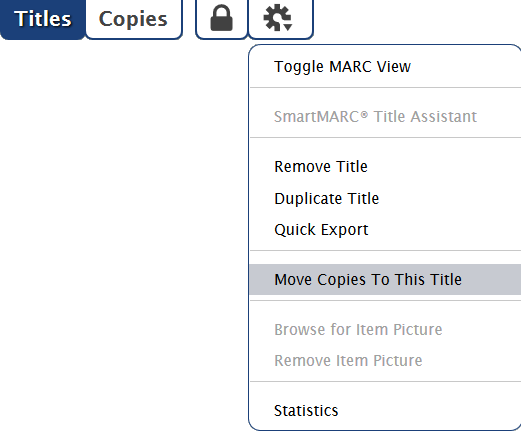
When the Titles information tab is selected, the Actions drop-down menu (represented by a gear/cog icon) contains specialized, title-centric item management functions such as the Toggle MARC View and Quick Export commands. - SmartMARC® Title Assistant. Opens the Title Assistant dialog, which allows you to add or update title records through configured z39.50 databases.
- Remove title. Permanently removes the selected title record and all associated copies; title holds and reservations will be lost.
- Duplicate title. Duplicates the currently selected title; other than creation dates, duplicated title records can be exactly the same.
- Quick export. Quickly exports the selected title record as a .txt file in MARC format.
- Add copy. Adds another copy to the current title.
- Move copies to this title. Opens the Move Copy dialog. Use this feature when a copy is mistakenly imported (or added) to the wrong title.
- Add picture. Opens an operating system standard explorer window, allowing you to guide Alexandria to the location of your saved item image. You can use GIFs, BMPs, PICs, JPGs (or most standard image files) as viable formats to add a picture to your item record. When applicable, the picture will appear in the Publication subtab of the Titles tab and in the Current Item pane of Circulation.
- Remove picture. Clears the current title picture.
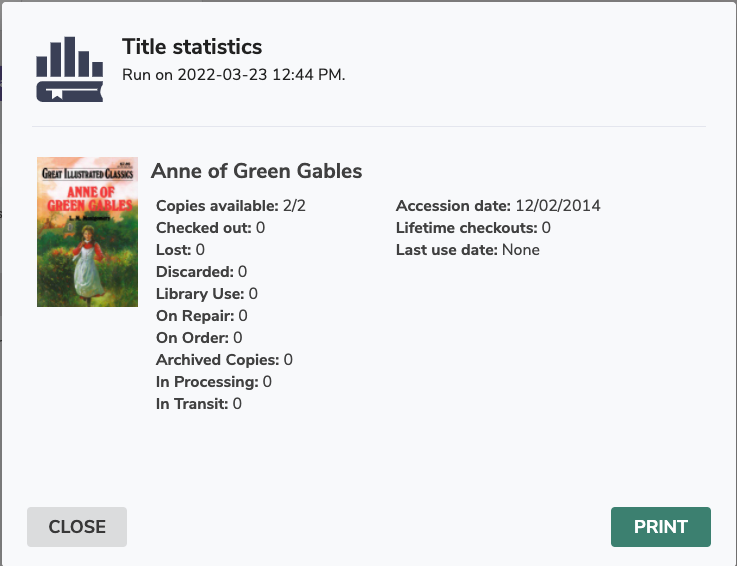
- Title statistics. Shows title-specific circulation information; this information is used to help assess library and item usage. It can be used for reference when ordering additional copies of items in high demand or weeding out infrequently used items. This statistical information can not be modified.
MARC Toggle  This button will transform the Current Record pane; you can toggle between the normal Item View and the more advanced MARC View Editor.
Step-by-Step InstructionsAdd a Title You can add, view, or modify title information directly from any of the Titles subtabs of the Items Management module. To locate a specific title record in your database, use the Item Lookup dialog by clicking the Find icon at the bottom of the items Records List pane. Before you can make changes to the record, you'll have to manually unlock it by clicking the Unlock icon in the control strip at the top of the Items Management module. To add or modify item information, place your cursor in a field with an existing value (e.g. LCCN or Series) and provide additional information. You can also highlight the entire value and replace it. To move to the next data entry field, press the <tab> key. To move to the previous data entry field, press <shift-tab> or <-tab>. To select a particular data entry field to edit, click in the field. To select from a drop-down menu, <tab> until the drop-down menu you desire is highlighted and use the <up> and <down> arrow keys to make your selection. Once you have provided all the necessary information for this item, click the Save button in the upper-right corner of the Items management window. If you want to ignore the information you have entered, click the Revert button and the previous item record will be displayed. Clicking Save button causes the new item to appear in the item Records List pane of the Items management module. You will be unable to select another record or leave the Items management module until you first Revert or Save your changes. To add a new title record to your database: - Log in to the Items module by adding /items to the end of your Alexandria URL.
- Make sure that the Titles tab is selected at the top of the control strip.
- Next, click Add Title located near the bottom of the Records List pane to open the Title Assistant.
- Once you've selected a matching record from the Title Assistant (or chosen to Enter [one] Manually), the Items management module will be cleared of all but your default values, some of which are required in order to save your new title.
- Move between the Publication, Subjects, Terms, Notes, Other, and Study Programs subtabs, providing information, configuring options, and making changes to the title record as needed.
- At the very least, Title, Medium, and Policy are required to save your new title. Of these fields, all but Title are defaulted.
- Click Save to add your new title record, or click Revert to discard it.
- Titles records are added without copies. After saving the new title record, Alexandria will ask if you'd like to add some copies.
- Clicking Add in this dialog is the same as selecting Add Copy from the Actions > Copies menu at the top of the Items Management control strip. If you choose to add copies, the Copies tab at the top of the control strip will be selected and the Copies subtabs, cleared of all but your default values, will be available.
Remove a Title Items that have been discarded, given to other libraries, sold, or permanently lost should be routinely removed from your database to keep reports and searches from becoming cluttered with obsolete information. However, be absolutely certain that the titles you are about to remove are to be permanently expunged from your collection. Only remove titles that you know will never return to your collection. - Log in to the Items module by adding "/items" to the end of your Alexandria URL.
- Make sure that the Titles tab is selected at the top of the control strip.
- Select Remove Title from the Actions: Titles menu to permanently remove the current title and all its copies.
- When a title is removed, all associated information is also removed. A title that has a copy checked out to a patron can not be removed.
| Warning |
|---|
Removing a title record is permanent and cannot be undone. If you remove a title in error, you will have to re-enter the information or recover it from an archive of your data. |
Move Copy to This Title Use this feature when a copy is mistakenly imported (or added) to the wrong title. - In Items, go to the Titles tab.
- Select the title from the list on the left.
- Click the Actions menu.
- Select Move Copy to This Title.
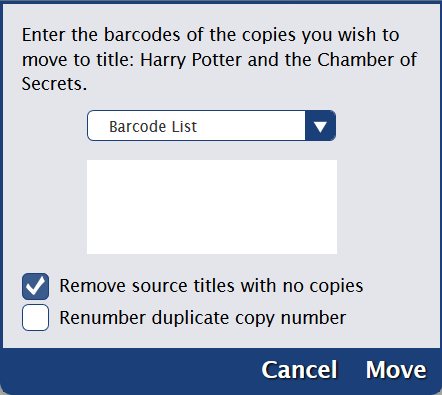
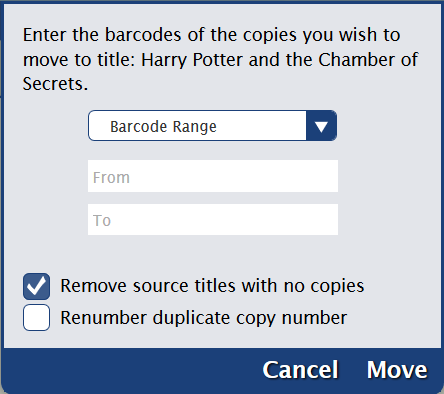
- From the drop-down menu, select if you want to enter a barcode list or set a range.
- Optional checkboxes:
- Remove source titles with no copies. If the copy being moved is the last copy of the selected title and you would like that title record to be removed after the move has been performed, leave this box checked.
- Renumber duplicate copy number.If checked, the copy will be assigned a unique barcode number if there is already a copy using this number.
- Click Move.
|
 Pardon the mess! The Support Center is undergoing construction.