 Pardon the mess! The Support Center is undergoing construction.
 ![]()

How helpful was this page?
Related Blog Posts
Blog Posts
-
How to add reports in the new beta–you beta be trying it!
created by
Jan 16, 2024
-
Remind me with reports... for notes!
created by
Oct 04, 2023
-
Loaned Items Notice for teachers
created by
Sep 21, 2023
-
Summer tip: how to print library cards
created by
Jul 12, 2023
-
End-of-year reports
created by
May 10, 2023
-
Curate your collection–Stats with Super Summary
created by
Feb 01, 2023
-
How to share your district report standards
created by
Jan 18, 2023
-
Share your top titles
created by
Jan 10, 2023
-
Cash drawer report to the rescue!
created by
Oct 04, 2022
-
¿Hablas español?- Filter search results by language
created by
Aug 16, 2022
Saved Reports
Last Updated: $action.dateFormatter.formatDateTime($content.getLastModificationDate())

Saved Reports
![]()
Alexandria makes it easy to build your own frequently-used, custom reports. The Saved tab contains custom reports that you (or others) have created, saved, and shared.
Select a report from the Report Selection pane to populate the Selected Report pane below. Saved reports tabs—Overview, Selections, Options, Notification, Schedule, and FTP—contain settings that are essential to how your reports are ordered, organized, and presented.
Saved reports can be run, modified, duplicated, or removed.
Saved reports only keep the selection criteria used to create the report, not the results of the report itself.
Toolbar
![]() Lock/Unlock. Click the padlock to unlock the record for editing.
Lock/Unlock. Click the padlock to unlock the record for editing.
![]() Actions
Actions
- Duplicate Report. Should you want nearly identical settings for a custom-created report, this allows you to make a copy of the selected Saved report, give it a new name, and make whatever changes you require.
- Delete Report. Permanently delete the selected saved report.
Switch Site. In a Central Union, click this icon to change the site you're working in.
![]() Operations Management. Go to Operations Management to view and download your finished reports.
Operations Management. Go to Operations Management to view and download your finished reports.
![]() Support. Having trouble? This will open support documentation for this topic in another tab.
Support. Having trouble? This will open support documentation for this topic in another tab.
MultiExcerpt named Categories was not found -- Please check the page name and MultiExcerpt name used in the MultiExcerpt-Include macro
Report Selection Filters
Once you've selected a category or subcategory, the associated reports will be listed in the Reports Selection pane on the right. You can further narrow your the list of reports using filters. In some ways, these filters far surpass the usefulness of the Categories pane. In fact, you may find yourself never using the Categories filters again, preferring instead to use the All Reports category in conjunction with the filter bar.
![]() Favorite. See the reports marked as Favorite.
Favorite. See the reports marked as Favorite.
![]() Shared. See the reports marked as Shared.
Shared. See the reports marked as Shared.
![]() Operator. See reports you (the current operator) have saved.
Operator. See reports you (the current operator) have saved.
![]() Filter. Enter a term to filter by report title.
Filter. Enter a term to filter by report title.
Filters can be applied in various ways. For example:
- To see only copy label-related reports, select the Copies category and type "labels" in the filter bar.
- To see all types of label reports, select the All Reports category and type "labels" into the filter bar.
- To see all shared label reports, select the All Reports category, select the Shared filter, and type "labels" into the filter bar.
Once you've sufficiently narrowed your filter criteria, scroll through the Report Selection list to locate and select the specific report you would like to view, modify, or run.
Create a Saved Report
- Go to Tools > Reports.
- With the Quick tab selected (default), use the Categories pane and report filters to locate and select the template you want to use.
- At the bottom of the Selections tab, click Create Saved Report.
- Enter a name for the new saved report (optional), then click OK.
- Modify the settings in each tab, then click Save.
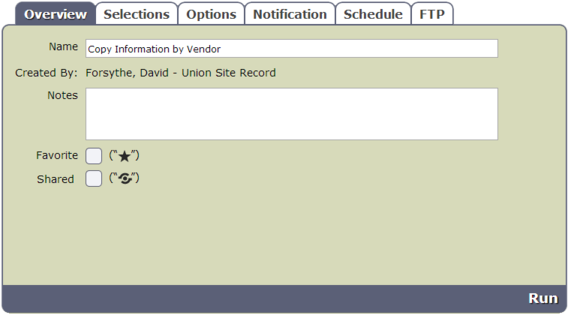
Overview
The Overview tab provides a Saved report summary, including the report name (e.g. Mrs. Smith - Overdues), report creator, usage notes (e.g. Run this report weekly!), and allows you to add Favorite and Shared report filters.
Settings
- Name. Provide or edit the name of the report here (e.g. Dr. Linus - LOST books).
- Created By. This information is automatically populated with the report creator's name and site ID code.
- Notes. You may provide general usage notes about the report here (e.g. Report created for Marjorie - Run daily!).
- Favorite. When this option is checked, the selected report will be classified as a “favorite” and can be ordered or filtered by such using the Favorite filter of the Saved tab. Favoriting frequently-used reports is often helpful when you quickly need to locate one, especially if you find yourself running the same reports daily.
- Shared. When this option is checked, the selected report is classified as “shared” and can be ordered and filtered using the Shared filter in the Saved tab. Sharing frequently-used reports with other operators is often helpful when specifically configured reports frequently run.
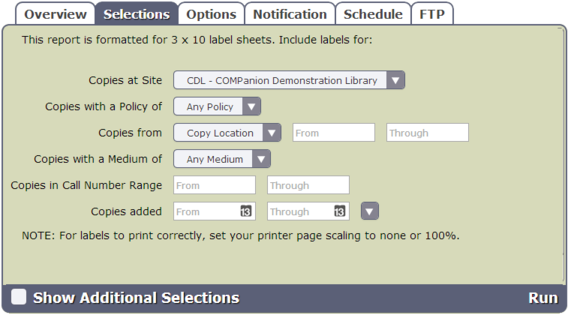
Selections
Building reports in Alexandria is clear cut, streamlined, and simple. The Selections tab is where you build the report to suit your needs; there are no illogical selections, redundant options, or nonsensical Boolean operators to sift through—nothing is offered that that doesn't directly apply to the report you are running. The best way to use this tab is to fill in the fields and drop-down menus from left to right, top to bottom. If you find some of your reports lacking the necessary selection information, try checking the Show Additional Selections box to get more options.
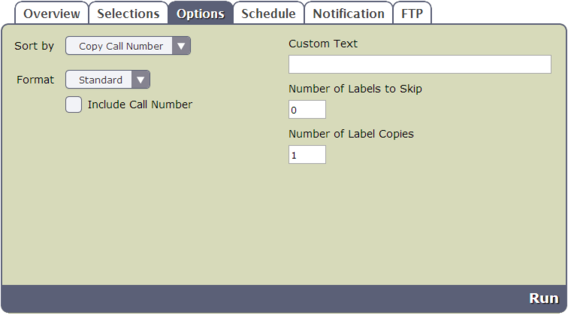
Options
Building reports in Alexandria is clear cut, streamlined, and simple. The Options tab is where you build the report to suit your needs; there are no illogical selections, redundant options, or nonsensical Boolean operators to sift through—nothing is offered that that doesn't directly apply to the report you are running. The best way to use this tab is to fill in the fields and drop-down menus from left to right, top to bottom.
Settings
- Sort By. The selection made from the Sort By drop-down menu determines how information in the report is ordered. Some selections sort by two (or more) values (e.g. Patron Level / Name ).
- Format. The selection made from the Format drop-down menu determines the layout of the report, such as Standard, 1 Line, or Detailed.
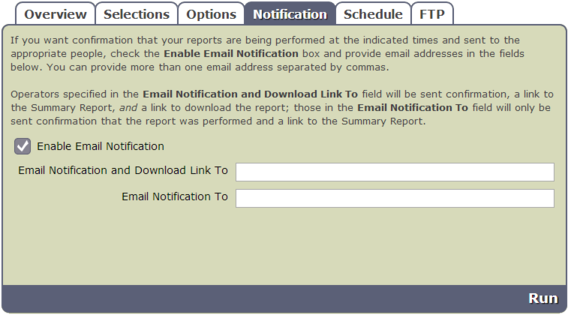
Notification
If you want confirmation that your reports are being performed at the indicated times and sent to the appropriate people, check the Enable Email Notification box and provide email addresses in the fields below.
- For example: johndoe@examplelibrary.com
You can provide more than one email address separated by commas.
- For example: johndoe@examplelibrary.com,janedoe@examplelibrary.com
Settings
- Enable Email Notification. Check this box if you want to enable email notification, sent upon report completion.
- Email Notification and Download Link To. In this field, provide the operator email addresses that Alexandria will use to send confirmation emails, a link to the Operation Summary, and a link to download the report.
- Email Notification To. In this field, provide the email addresses that Alexandria will use to send notification emails when the report has finished printing and a link to the Operation Summary; you can provide more than one email address separated by commas.
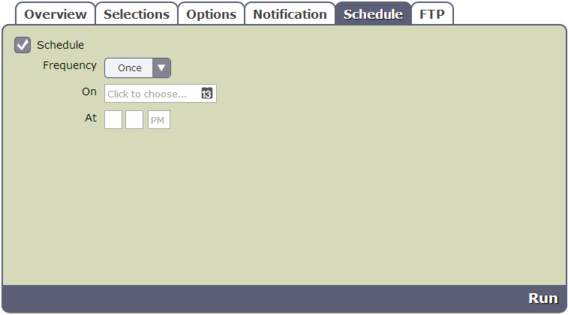
Schedule
The Schedule tab—useful only for Saved reports—is comprised of a fairly straightforward layout full of simple, time-saving features. For instance, let’s say that you wanted to run a certain report every Friday at 5:00am. Using the Frequency drop-down menu, select Weekly; from the On drop-down menu, select Friday; finally, using the At fields, enter 5 and AM.
Settings
- Schedule. Check this box to unlock the Saved report scheduling capabilities.
- Frequency. This drop-down menu allows you to specify how often you would like to repeat your Saved report. You can select Once, Daily, Weekly, Monthly, Yearly from this drop-down menu. Secondary On options may dynamically appear, depending on your selection.
- Once. This options allows you to use the Date Picker to select a date.
- Daily. There are no secondary options available for this selection.
- Weekly. This selection will repeat the report every week on a Monday—Sunday of your choosing.
- Monthly. This selection will repeat the report once a month on a specific day—from the 1st through the 31st—of your choosing.
- Yearly. This selection (limited to one year) will repeat the report once a year on a specific month and day of your choosing.
- At. Use these fields to select the hour, minute, and ante/post meridiem to run your report.
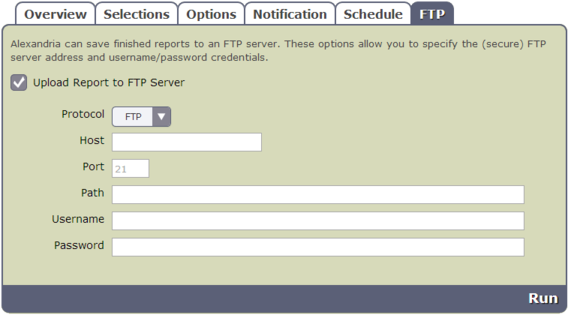
FTP
Alexandria can save finished reports to an FTP server. These options allow you to specify the (secure) FTP server address and uername/password credentials.
If you find yourself uncertain what an FTP server actually is, it's essentially just a software application that uses the File Transfer Protocol (i.e. FTP[1]), a protocol used for sharing files over the internet. There are several FTP server software packages available that you can download and use for free.
Settings
- Upload Report to FTP Server. Selecting this option allow you to specify your (secure) FTP server URL and username/password credentials.
- Protocol. If you'd like a more secure transmission that hides the username/password and encrypts the file content, FTP can be secured with SSL/TLS (i.e. “ftps://”). Be aware that the name “Secure FTP” can be confusing because it refers to two completely different protocols: “SFTP” and “FTPS”. Whenever the term Secure FTP is used, it is necessary to specify whether the SSH-based or SSL-based file transfer protocol is meant. Alexandria supports FTPS; the SSL-based file transfer protocol.
- Host. Provide the host name or IP address of the FTP-accessible server; for example, “myserveraddress.com”. Don't worry about including the URL protocol/scheme (e.g. “ftp://”) as this is automatically appended before the host name depending on your Protocol selection (above).
- Port. While “FTP” typically runs over TCP port 21, “FTPS” (SSL/TLS) typically runs over port 21 or port 990; if you don't have permission to open multiple ports, both unencrypted “FTP” and encrypted “FTPS” will run over port 21.
- Path. Provde the full path including filename and directories; for example, “/directory/subdirectory/filename.txt”.
- Username and Password. Provide a clear-text authentication and sign-in protocol in the form of a username and password. If your FTP server is configured to allow it, you can connect anonymously without having to enter anything