 Pardon the mess! The Support Center is undergoing construction.
 ![]()

Researcher
The root page ALEX:Researcher could not be found in space Alexandria.
How helpful was this page?
Related Blog Posts
Blog Posts
-
Site-specific eBooks
created by
Jan 10, 2024
-
User-friendly–optimize your setup
created by
Dec 01, 2023
-
Builder: customize your search
created by
Nov 21, 2023
-
Making search strings using advanced search
created by
Nov 01, 2023
-
Creating a slideshow for spooky season–or any reason!
created by
Oct 17, 2023
-
Items: a few things you may not know...
created by
Apr 12, 2023
-
Weeding items: why keep discarded items?
created by
Mar 29, 2023
-
Enhance your skills in Alexandria–Virtual Librarian
created by
Feb 14, 2023
-
Share your top titles
created by
Jan 10, 2023
-
Searching by Subject
created by
Nov 16, 2022
Slideshow
Last Updated: $action.dateFormatter.formatDateTime($content.getLastModificationDate())

Slideshow
![]() Researcher > Slideshow
Researcher > Slideshow
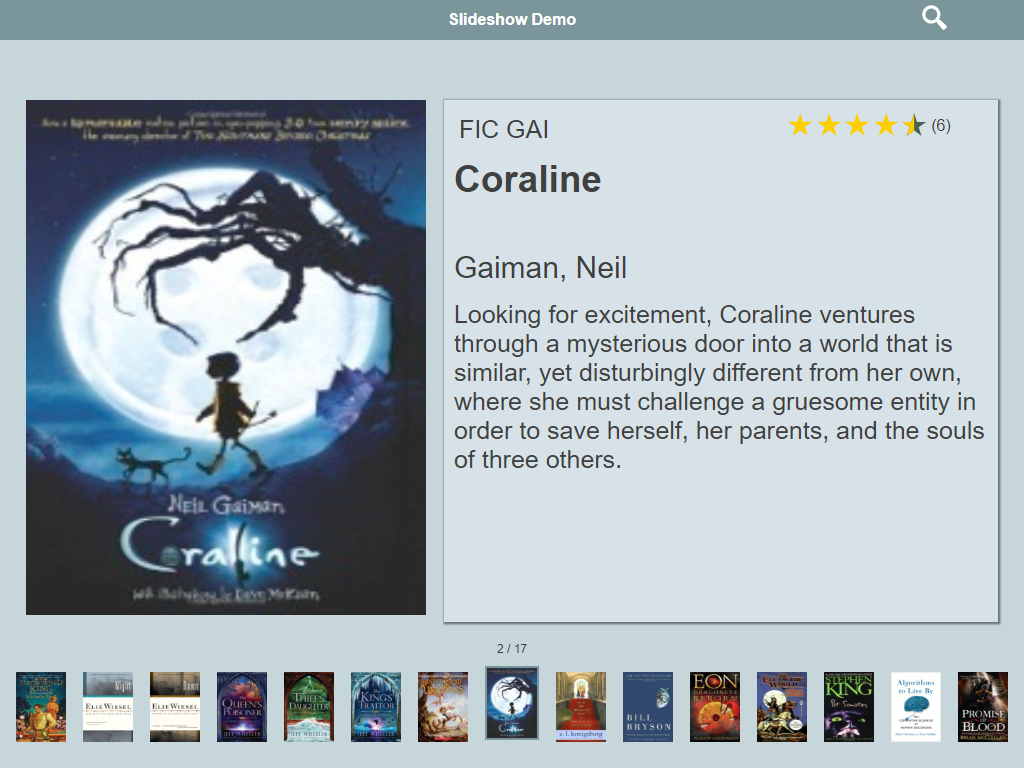
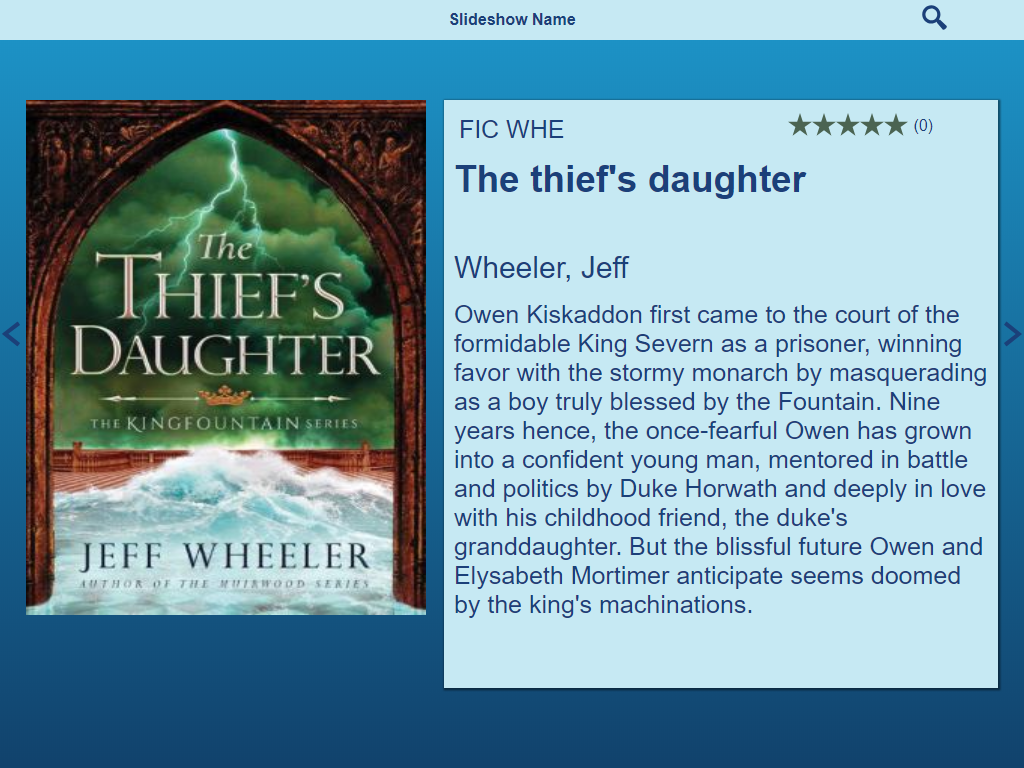
Alexandria's Slideshow interface gives you a fun way to dynamically display a range of titles from search or saved results for educational or promotional purposes. You can limit the Slideshow to display on a television or projector that does not allow user input or to a dedicated display that does allow user input, such as a tablet device on a display table. Additionally, you can add a Slideshow button to your Explore window.
To access Alexandria's Slideshow interface, type the IP address (or domain name), port number, and (optional) serial number of your Data Station followed by “/slideshow” into your browser's Address field (usually located in the upper-left corner of the window). Refer to Accessing Alexandria for more detailed information.
How It Works
The main Slideshow interface is essentially divided into two distinct sections. What appears in the Slideshow interface depends on the value provided in the Slideshow Search Term field of Slideshow preferences. This can either be a generic search term or a more complicated search string syntax.
Titles that match your Slideshow search criteria are displayed in the order which they were discovered. The currently selected title will transition to the right in a set interval of 5—60 seconds; this is configured in your Slideshow preferences.
Select a title below the slideshow to view detailed information about the title, including Call Number, Title, Author, Medium, Series, Genre, and average Rating. You can select any title from the row of items. If you select the middle item whose details are currently being displayed, you will temporarily halt the the automatic transition interval for up to one minute. If you select an item that is not currently being displayed, it will align to the center and display title details for one minute. After the minute is up, focus will move to the title directly after the one selected and continue from there.
To search for a title in the slideshow, click the ![]() icon in the top right corner of the window to open Search with the same search string used for the Slideshow you were viewing.
icon in the top right corner of the window to open Search with the same search string used for the Slideshow you were viewing.
If there are no matching records for the Slideshow search query, it will display a "search returned no results" error. If the query returns less than five results, it will display a message saying "too few results".
This page has been moved to https://support.goalexandria.com/researcher/slideshow/
Slideshow URLs
Use Explore Builder to set a custom Slideshow URL based on specified search strings. This allows you to build Slideshows for holidays, seasons, famous people or any other topic. It's a fun and dynamic way to present new and exciting books to your patrons!
1. Log in
Go to Tools > Explore Builder, or enter /explorebuilder at the end of your Alexandria login URL.
2. Select a pane
On the left is a list of the Explore panes you can modify. Select the pane you want to add a slideshow to, or click ![]() to add a new pane.
to add a new pane.
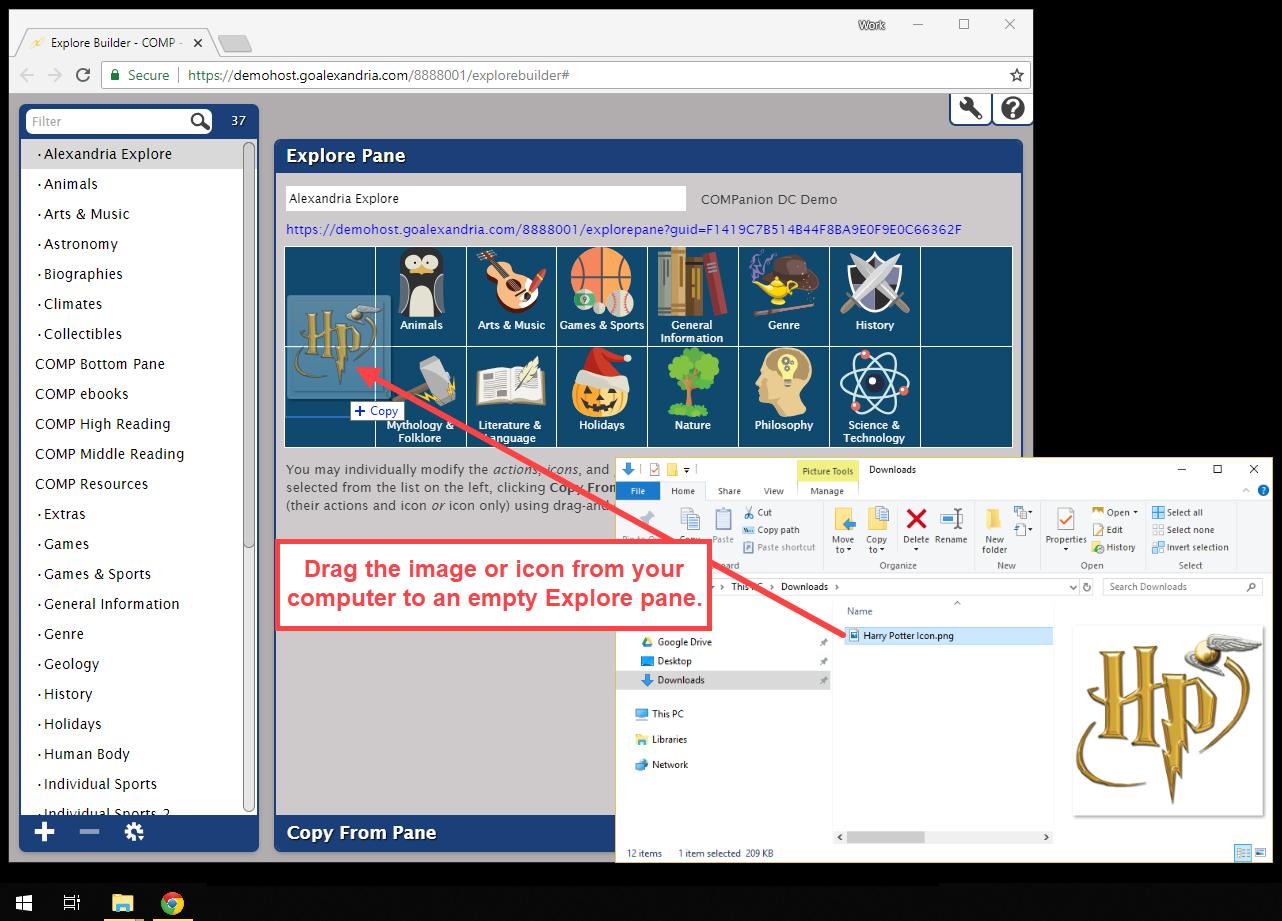
3. Add an image
On your computer, open a File Explorer (Windows) or Finder (Mac) window.
Locate the image or icon you wish to add to Explorer, then drag that icon into an empty pane.
Click Save.
You can use virtually any image as an icon. We recommend using .jpg, .jpeg, .svg, .png, or .tif images that are roughly 128x128 pixels at 72dpi.
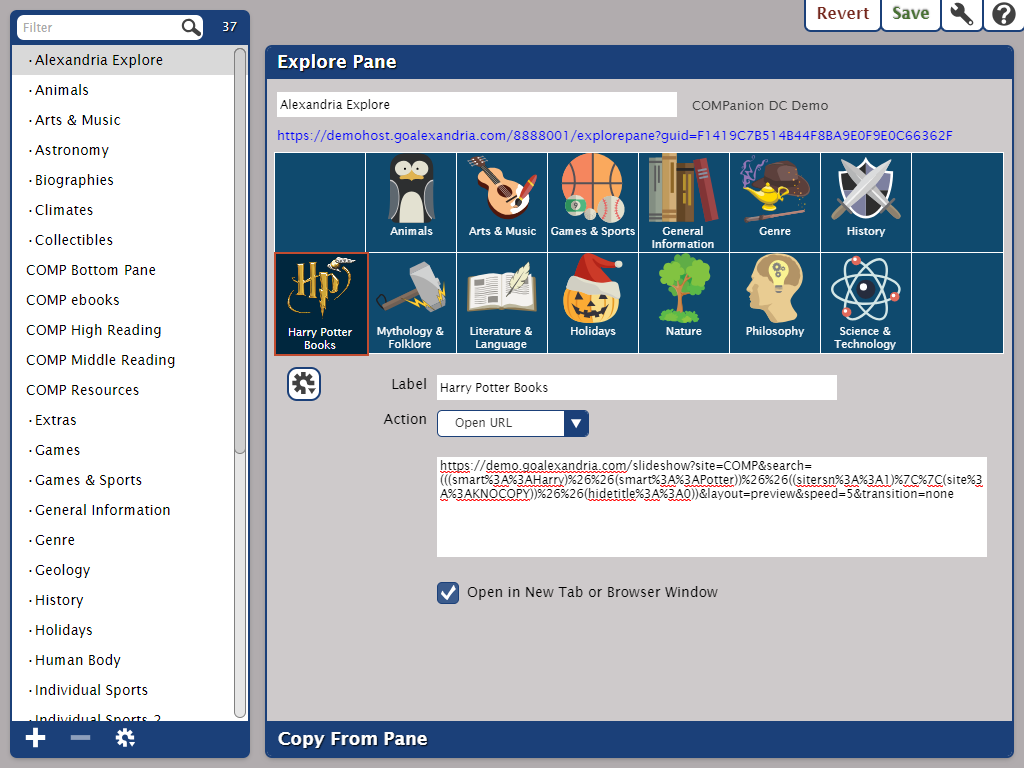
4. Configure the button
Now you need to configure the icon to point to your Slideshow URL.
Select the pane you just added the image to, then configure the settings below.
- Label. Enter the name of the slideshow. This will also be the name of the button.
- Action. Select Open URL.
- Label. Enter the name of the slideshow. This will also be the name of the button.
5. Add the URL
In the box below, paste the complete URL of a previously created slideshow, or create a new one. If you don't have a URL yet, build a new slideshow in Slideshow Preferences, then click View Slideshow to open it in another tab or window. Copy the complete URL from your browser window, and paste it in this box.
Here's an example: https://yourlibrary.com/slideshow?search=((Smart::space))&layout=preview&speed=5
You can also edit the URL to set custom search string variables for topic, layout, and speed.
- Search. The subject or topic your Slideshow will cover, i.e. "Space" or "Egyptology". You can use more complicated or specific search strings here.
- Speed. The number of seconds each slide will be displayed before rotating to the next one.
6. Save
When you're done, hit Save in the top corner of the window.
Your Explore window will now feature the icon you chose. Click on it to open the slideshow!