August 19th, 2019
If you've added new items to your collection—like we discussed last week—you might need to print some new barcode and spine labels. Here's some information on how to easily choose and customize your labels using Alexandria Reports!

Go to Reports > Copies > Labels and you'll find a list of spine and barcode labels. There are lots of options... so which one should you use?
Label options
Copy Labels (3x10). COMPanion part number V0055. Typically these work as your barcode labels. But you can print anything else on them, such as envelope labels.
Copy Labels (4x20). COMPanion part number V0036. These are much smaller labels, which makes them good for study program indicators.
Copy Labels (5x10). COMPanion part number V0034. These spine labels are a bit wider than the V0032 labels. They look better when you have longer call number segments, but fewer total segments.
Copy Labels (8x6, Tall). COMPanion part number V0032. Use these spine labels if you have several lines in your call numbers, as these are a bit taller than the V0034 labels.
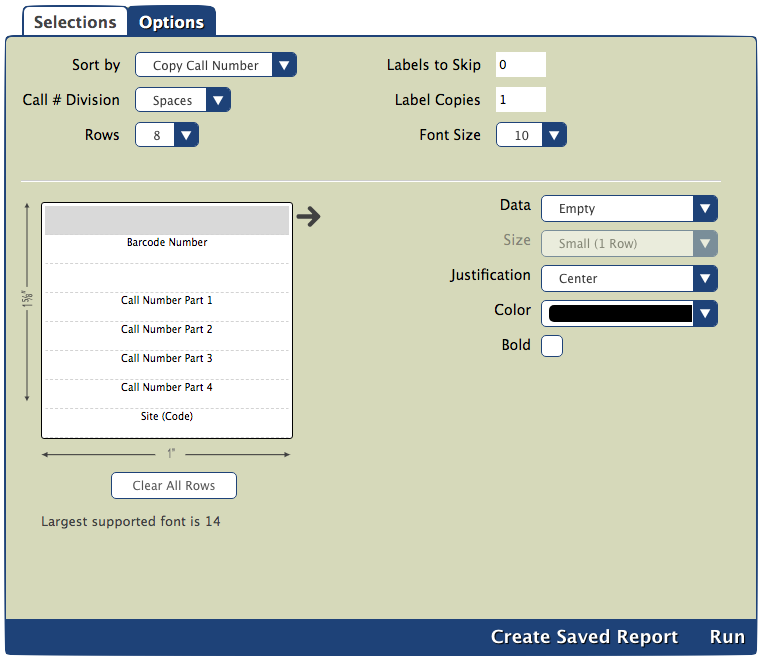
Copy Labels (8x6, Tall), Variable. These are just like the 8x6 Tall report, but with a twist. The new variable options allow you to choose the number of rows and font size to get that perfect spine label.
Copy Labels (8x6, Wide). COMPanion part number V0032. These are the same label sheets as the 8x6 Tall, but it prints the information from a different orientation, so you get wider (but shorter) labels.
Copy Labels (8x6, Wide), Variable. The variable version of the 8x6 Wide labels, which allows you to choose the number of rows and font size.
Custom label reports
All of the label options listed above are custom label reports, meaning they support advanced options to help you get that perfect label. What specifically can you do with custom label reports?
Customize the Data. Choose what gets displayed on each label row, such as your site name, barcode number, call number, author, or any custom text.
Bold. Make the entire text of the label easier to read or differentiate certain parts of the data by bolding it.
Align. Print your call number text in the middle of your spine label, or on the left. Or on the right. Your choice.
Choose the Font Size. Use one row per line of data to fit more information, or double up and choose large rows for larger font.
Step-by-Step Instructions: Print some spine labels
- Choose the label report that best fits your needs.
- Customize your Selections. For example, say you wanted to include copies added over the last three days. You'd simply enter the date range for the last three days for the Copies added selection.
- Under Options, sort the report by how you have your items stacked up, or by something like Title.
- If you have spine labels already, remember to set up the data and rows of this report to match your current labels as closely as possible. If this is your first set of labels, make those important formatting decisions!
- Click Create Saved Report if you'll need to print more of these labels in the future. Now you won't have to keep setting all the right selections and options each time!
- Run the report.
- In Operations Management, download the report PDF and open it.
- Print a test page first. Put normal paper in the printer, and choose to print only page 1 of your pdf. Once you're satisfied with how it looks on regular paper, try out a single sheet of labels. Adjust as necessary. Remember to set sizing to 100% in the print pop-up window. (And take a look at our other troubleshooting tips.)
- Once everything is good to go, print page 2+ (no need to print page 1 again!).
If you need any help printing your labels, call us anytime at 1.800.347.4942!
These steps are for Alexandria version 7, which has a lot of cool label features. Still on version 6? Learn about switching to 7! |
