
Contents
Troubleshooting
All data is subject to the same import rules as Alexandria:
- Import fields can NOT begin or end with spaces or contain control characters.
- All runs of more than one space will be converted to a single space.
- Tab-delimited import files must contain a title field.
- Added titles must have a valid title with one or more characters.
Import Settings
If the import options and/or the import data can not be reasonably processed, an error message is placed in the Operations Manager Summary PDF and the import is terminated or the record is Ignored.
If the import is not terminated, the Summary PDF will contain a line item for each imported record, with how it was processed, ADDED or UPDATED or Ignored (Title if available) (Barcode if available) — at the end of the Summary should be a “summary” or count of the total number of records ADDED, UPDATED or Ignored.
Reject Import File
- Import files must have a Title field.
- If the import file is Tab Delimited file and there is no Title field in the import header; this is an error and the import is terminated with “Title Field required in import records. Import canceled.” The import is canceled. This is included in the summary file.
Record Error Logging
Added Titles must have a valid Title of one or more characters, or “Missing Title data, import record ignored.” is logged in the Summary and the imported record is ignored.
Ignore Rules
Settings that are not relevant to the selected Import Settings are visible and enabled, but the data is ignored for the import.
Valid with every scenario where a title is added or updated (i.e. all radio button options except Update Copies). Note that this only applies if there is no barcode in the import record.
Title and Copy Import Options are honored when adding NEW Title or Copy records.
From <http://support.companioncorp.com/brikit/pages/editpage.action?pageId=4131810>
Overview
![]() Tools > Import > Textbooks > Saved tab
Tools > Import > Textbooks > Saved tab
This is a brief summary of the import. The contents of this and other tabs may change based on the import you've selected.

Settings
Name
Enter a name for this saved import.
Created
Displays the name of the operator who created the import and their Site ID Code. It cannot be edited.
Notes
Enter general usage notes about the import here. Something like, "Only perform this import at the end of each month!"
Favorite
Save this to your favorites list for easy access.
Shared
Share this with other operators in your library or union. This is often helpful when particular imports are used frequently.
Settings
![]() Tools > Import > Textbooks > Saved or Quick tabs
Tools > Import > Textbooks > Saved or Quick tabs
This is where you configure how title and copy information is imported into your database.
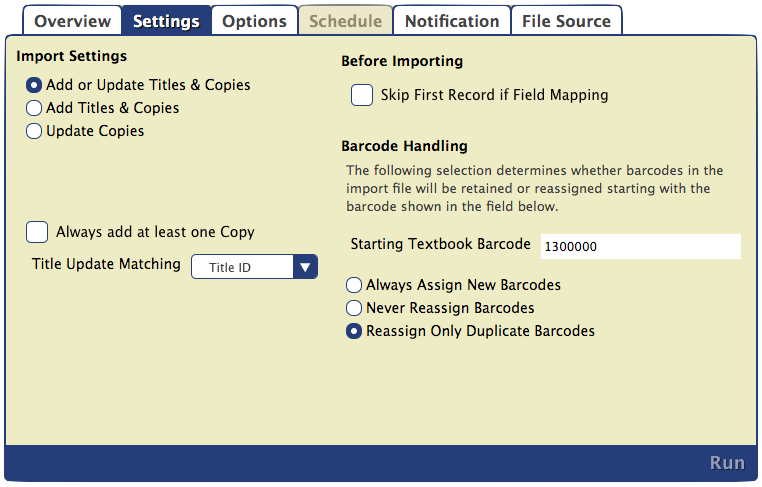
Import Settings
Add or Update Titles & Copies
Add or update title and copy records. Copies will only be updated if they match the associated title record.
- Title records will be updated if they match the title record number, title ID, ISBN, copy record number, or copy barcode (checked in that order). If there is not an existing copy to update, a new title will be added.
- If copy data is in the import file, a copy record will be created and added to the title record.
- If a title is added and the associated copy barcode is in use, the import will follow Barcode Handling rules
- Title records will be updated if they match the title record number, title ID, ISBN, copy record number, or copy barcode (checked in that order). If there is not an existing copy to update, a new title will be added.
Add Titles & Copies
Add a new title record for every import file record.
- If there are any copy fields, or if Always add at least one Copy is selected, a copy record will be created for the new title.
- Titles and copies cannot be updated with this setting.
Update Copies
Each import record that matches the copy record number or copy barcode will be updated. Title fields will be ignored.
- If a copy record number is used to match, the import can be used to update the matching copy record's barcode using Barcode Handling rules.
- If a matching copy record is not found, the imported record will be ignored.
Always add at least one Copy
This option specifies that at least ONE new copy is always added when a title is added or modified. When adding a copy, the next available barcode is used. If one or more copies are added when the title is added or modified, additional copies are NOT added.
Record numbers can never be changed; they are used for matching only.
Before Importing
Skip First Record if Field Mapping
This is usually recommended when the first record in your import file contains an unrecognized header. The setting will ignore recognized COMPanion headers so they are imported properly.
Barcode Handling
The following settings determine how copy barcodes are handled when adding copy records to a new or existing title.
Staring Textbook Barcode
When a new item barcode number is required, Textbook Tracker will assign numbers beginning with the value you enter in this field. If a barcode is already in use, a new barcode will be automatically selected.
Always Assign New Barcodes
All item barcodes will be reassigned starting with the Starting Textbook Barcode number (above). If you know for sure that your vendor assigned “dummy” barcode numbers with your MARC records, use this option to force Textbook Tracker to assign new barcode numbers according to the Next Barcode setting in your Patron Defaults preferences.
Never Reassign Barcodes
Trying to add copy data with duplicate barcode numbers will cause the imported record to be ignored. Use this setting if you want existing copy data to be updated, not reassigned.
Reassign Only Duplicate Barcodes
Imported barcodes that already exist in your database (duplicates) will not be reassigned. (Default)
Options
![]() Tools > Import > Textbooks > Saved or Quick tab
Tools > Import > Textbooks > Saved or Quick tab
The options in this tab only apply to added items. It is disabled when the import setting is set to Update Copies.
Copy Data Options
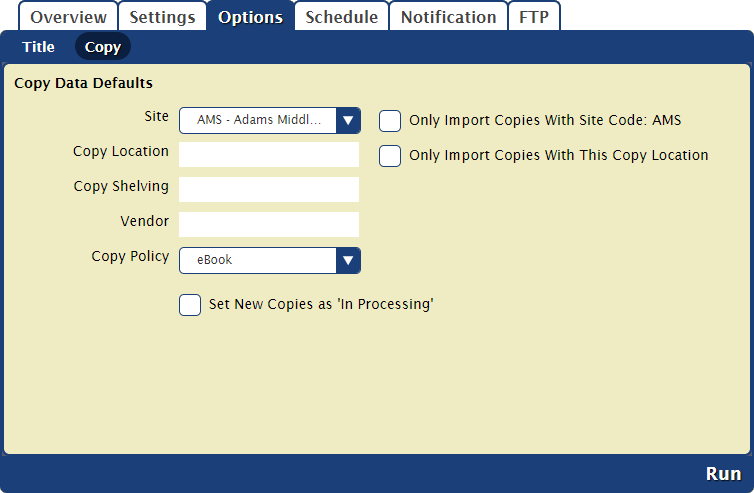
Site
Select the site the items will be assigned to. The dropdown menu is disabled if there is only one site in your union.
Only Import Copies with Site Code: XXX
Check this box to narrow your import to copies at a single site.
Copy Location
This information can help patrons find items in your library. Patrons generally locate copies by call number, but if you have items outside of the library or in an unusual place, you can enter that location here. Examples: Music Room or Computer Lab.
Copy Shelving
This is a second location indicator option if you want to further detail the location of items on specific shelves at your location.
Vendor
Enter the name of the vendor from which the copy was received.
Default Copy Policy
Enter a copy policy to be applied if the copy is imported without policy data. The default policy for the site performing the import is specified in Preferences > Items > Item Defaults > Default Policy.
Set New Copies as ‘In Processing’
Check this box to set the status of newly imported copies to In Processing after it's imported.
Title Data Options
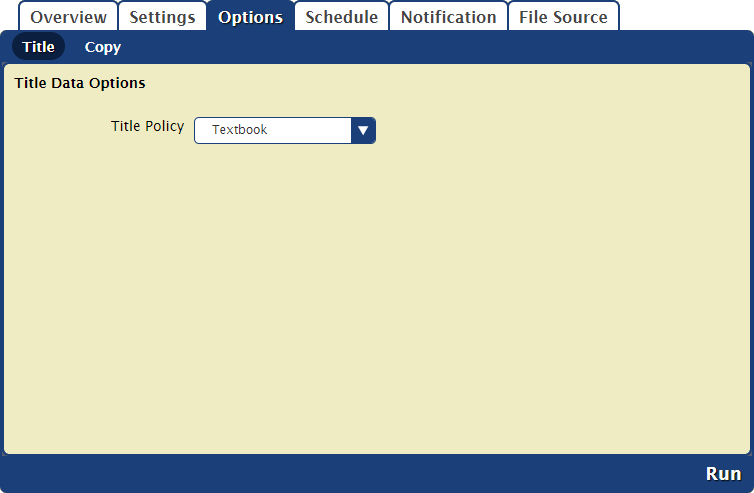
Title Policy
Select the policy to be applied to the items you're importing.
Schedule
![]() Tools > Import > Textbooks > Saved tab
Tools > Import > Textbooks > Saved tab
Use these settings to schedule this import to run on a regular basis.
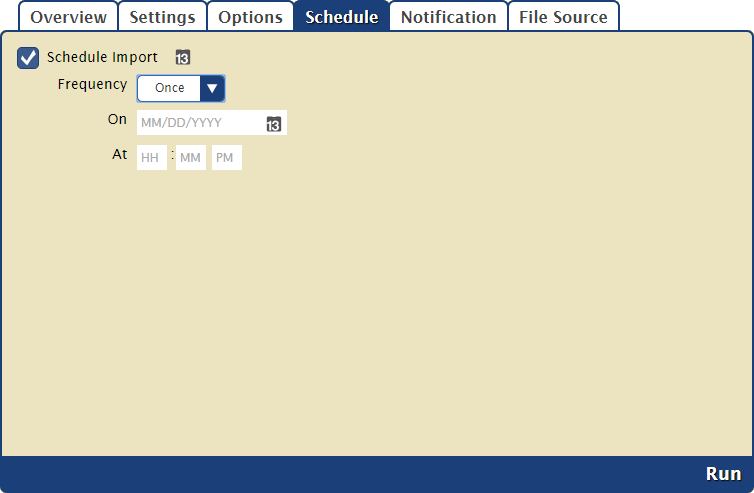
Settings
Schedule
Check this box to unlock the scheduling options.
Frequency
This menu allows you to specify how often you would like to repeat your import: Once, Daily, Weekly, Monthly, or Yearly.
On
The options here depend on the frequency you selected above.
Once. Choose the date to run this import.
Daily. On options are not necessary if the import is run daily.
Weekly. Choose the day of the week to run this import.
Monthly. Choose the date the import will run each month.
Yearly. Choose the month and date the import will run each year.
At
Choose the time of day, including a.m. or p.m., to run the import.
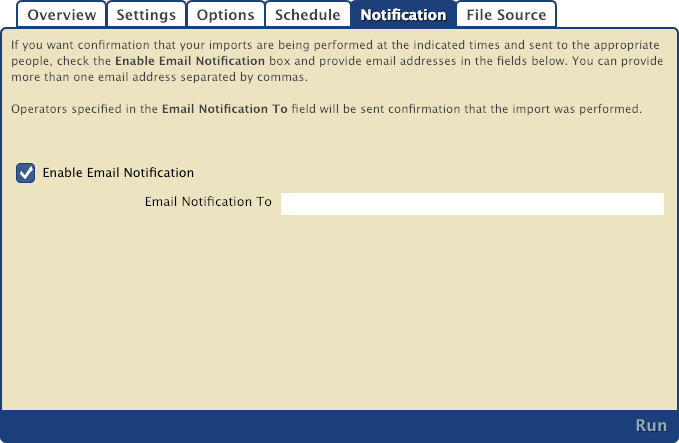
Notification
![]() Tools > Import > Textbooks > Saved tab
Tools > Import > Textbooks > Saved tab
Here you can enable an email confirmation to be sent to the recipient(s) of your choice once the import is complete.
Settings
Enable Email Notification
Check this box if you want to enable email notifications to be sent upon completion.
Email Notification To
Enter the recipient email addresses. You can provide more than one email address separated by commas.
- For example: johndoe@examplelibrary.com,janedoe@examplelibrary.com
File Source
![]() Tools > Import > Textbooks > Saved tab
Tools > Import > Textbooks > Saved tab
You can import new or update existing records from a database stored on an FTP server. The options in this tab allow you to specify the (secure) FTP server URL and username/password credentials so Textbook Tracker can locate the import file. An FTP server is required for imports to be scheduled.
Settings
Protocol
Click here to choose FTP or FTPS (secured by SSL).
Host
Enter the host name or IP address of the FTP server without the URL protocol, such as myserveraddress.com.
Port
By default, FTP runs over port 21 and FTPS runs over port 990. You can manually enter a different port, if necessary.
Path
Enter the full path to the file, including directories and the filename, such as /directory/subdirectory/filename.txt.
Username and Password
Enter your FTP login credentials. If your FTP server is configured to allow anonymous connections, the username and password may not be necessary.
Field Mapping
Use the Field Mapping dialog to specify where to import the data by mapping the fields in your database to the fields in the source data you’re importing. Read Field Mapping for more information.
FTP, short for File Transfer Protocol, is a set of rules (language) used to transfer files between computers on a network, such as the internet. There are two computers involved in an FTP transfer: a server and a client. An FTP client is an application that allows you to upload, download, and otherwise manage files stored on the FTP server. There are several FTP clients available for free, such as FileZilla and Cyberduck.