The Support Center has moved!! See the new website https://support.goalexandria.com/ ![]()

Administration Settings

Administration Settings
![]() Tools > Administration
Tools > Administration
The Administration settings are high-level preferences intended for network administrators, IT support departments, or operators with administrator-level permissions; in other words, they're advanced settings used to configure your main Data Station once and then be forgotten.
While every operator with the proper security permissions can access the Administration module, it contains settings that most operators won't be able to configure without help. An operator's access to these settings is governed by Alexandria's security preferences. Your library's administrator can manage these settings in Tools > Preferences > Security.
Navigation
| Status | These settings allow you to perform maintenance on your library catalog and update your Alexandria program. |
| Web | These settings allow Alexandria to communicate over the internet. |
| Database | These settings allow you to set up automatic archives and database maintenance. |
| These settings allow you to designate an SMTP server to use for sending emails, such as Item Overdue Notices, to patrons and/or staff. | |
| LDAP | These settings allow you to authenticate operator and patron program access. |
| Checkpoint | If your library utilizes the Checkpoint ILS security system use these setting to enhance your SIP2 protocol. |


Actions Menu
This menu appears on each interface of the administrative settings in the upper left corner. These options allow you to update to latest version, send your library data to COMPanion, log out of the program or quit the data station remotely.
- Check for Updates. If there are any updates available, it will be listed here. You simply click on the version number to initiate the upgrade. Additionally you may download the latest update by visiting our downloads page, and for larger organizations may use Alexandria's Version Limiting service; contact your sales representative for information and pricing.

- Send Data to COMPanion. If a Customer Support Representative needs your library data for troubleshooting you can easily send it to us by selecting this option and entering the Authorization Code you are provided.
Log Out. This button will log you out of Alexandria, despite if you have multiple windows open.
Quit Alexandria. This option will stop the Data Station from running and log out any active operators.
 LDAP
LDAP
![]() Tools > Administration > LDAP
Tools > Administration > LDAP
LDAP supports user-authentication for open or active directories.
Lightweight Directory Access Protocol (LDAP) is an application protocol for querying and modifying directory services running over TCP/IP. Alexandria supports user-authentication using existing log-on credentials maintained on a separate directory server. With LDAP enabled, administrators can now choose to manage these credentials on a central LDAP server as these credentials may change frequently and often need to be standardized across many different systems. A permanent record must exist locally in the Alexandria database for all patrons and operators that use the system however their log-on credentials can be managed outside of Alexandria on your LDAP server directly.
Operator usernames and barcodes must be unique. Please make sure your Alexandria patrons do not have the same barcode as an operator.
How does it work?
The COMPanion software will send the credentials the user enters in any log-in dialog to the specified LDAP server in the form of a BIND. If the BIND is successful, the software will locate the user's record within the local database by searching the information returned in the specified Local ID field from the LDAP server. Once the record is found, the user will be logged in. Alexandria will test the credentials against the local data base if the login attempt fails.
Configure LDAP Settings
If you are a Centralized Catalog these setting will apply to all sites within your controller.
- Go to Tools > Administration > LDAP.
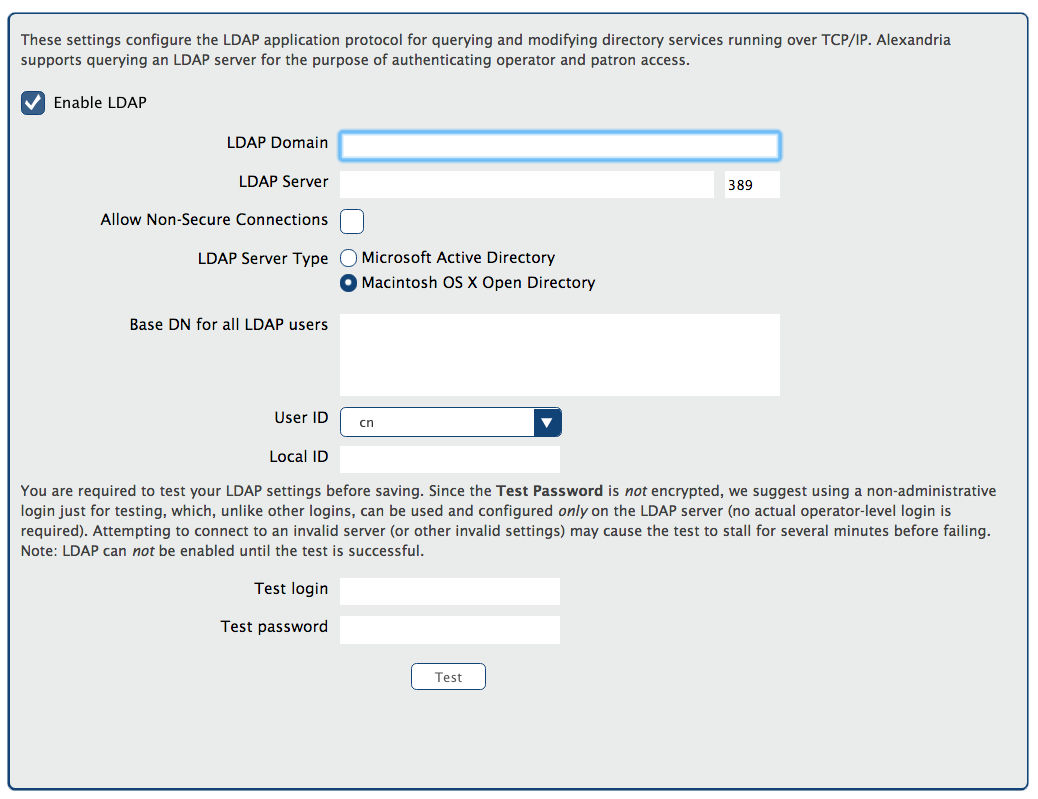
- Enable LDAP. Check this box.
- LDAP Domain. Enter the name of you LDAP domain, i.e. “yourdomain.com” in the LDAP Domain field. The domain name is used in conjunction with sAMAccountName to produce a complete userPrincipalName.
- LDAP Server. Enter the full name of the LDAP server, i.e. “ldap.yourdomain.com” in the LDAP Server field. This will be the host address of the LDAP server for network communication.
Allow Non-Secure Connections. Check this box if you would like Alexandria to use non-TLS connections when it cannot make an TLS connection. (optional)
We highly recommended that you secure communications with the LDAP server by requiring TLS. TLS configuration is performed at the system level. When these settings are correctly configured for secure communications with your LDAP server, Alexandria will be able to communicate with the LDAP server securely.
- LDAP Server Type. Select Microsoft Active Directory or Macintosh OS X Open Directory.
- Base DN for all LDAP Users. Enter a DN that matches all the users, i.e. “cn=users,dc=ldap,dc=yourdomain,dc=com”.
- Multiple Base DNs can be specified if separated by semicolons i.e. “cn=staff,ou=COMPanion,dc=demo,dc=goalexandria,dc=com;cn=student,ou=COMPanion,dc=demo,dc=goalexandria,dc=com”.
- User ID. Select the User ID from the dropdown menu. This is the LDAP login name; for an Open Directory, this is typically uid (i.e. “uid=yourlogin"). For an Active Directory this is typically sAMAccountName or userPrincipalName.
- Local ID. Enter the LDAP database username that contains the patron username or patron barcode in Alexandria in the Local ID field. This must be one of the users' LDAP attributes; common attribute names include uid, uidNumber, givenName, cn, and others.
- Test Login. Enter the Test Login.
- Test Password. Enter the password for the test login.
- Click Test. This button initiates an attempt to log into the LDAP server using the settings and credentials you've entered.
- Click Save in the upper right corner of the window.
More LDAP Testing
If configured correctly, your users should be able to log into Alexandria using the same login credentials as configured on the directory server for their account. However, sometimes difficulty arises. In these cases, verify your preferences settings and test whether the Base DN and other information you have specified is accurate to your configuration.
We have found that Active Directory configurations seem to prefer binds using the user's CN while OSXs Open Directory prefers the uid (i.e. user identification). The use of ldapsearch tool is suggested. Alternately, ldp.exe can be utilized for testing in a Windows environment.
Non Secure Connection Testing
The -ZZ parameter requires successful connection utilizing StartTLS over port 389. If you have selected to Allow Non-Secure Connections, omit this in your testing with ldapsearch as well.
 Checkpoint ILS
![]() Tools > Administration > Checkpoint
Tools > Administration > Checkpoint
Configure these settings if you are using the Checkpoint ILS (Intelligent Library System) security system to enhance your SIP2 protocol. Remember, this should only be enabled if Checkpoint's SIP2 hardware is in use (SIP2 hardware is not interchangeable between manufacturers). The technician installing your Checkpoint system should be able to configure these settings for you.
Make sure all SIP2 settings are correct and that you have an FTP server running on the same machine as your Alexandria Data Station. The ILS server will place an inventory file on your Data Station. If you are not running an FTP server on your Data Station, the inventory file will need to be placed manually.
Checkpoint ILS settings are available to those running a Centralized Catalog or a Distributed Catalog, regardless if it’s under a Controller or an independently operated Data Station. These settings also appear for those benefiting from our Cloud-Hosted services. Note: In a Centralized Catalog, these settings will apply to all sites.
Settings
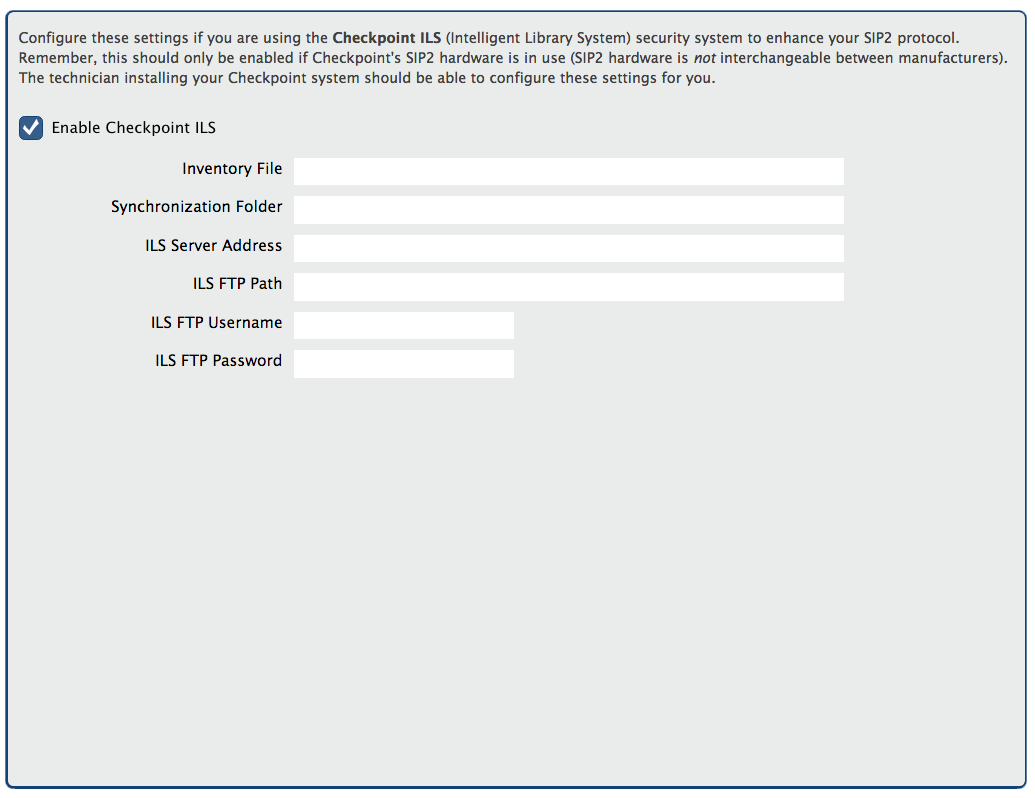
- Enable Checkpoint ILS. This box should only be enabled if Checkpoint's SIP2 hardware is in use.
- Inventory File. The directory that the ILS server places the inventory file it creates. If the ILS server has not yet created an inventory file, an empty file (of the same name and path) should be created.
- Synchronization Folder. As part of the Checkpoint ILS system Alexandria creates a “synchronization file” that contains a list of barcodes for each item that is currently outside of the library (checked out). This “synchronization file” (named co_cache.txt) is placed inside the synchronization folder that is user-specified in this field.
- ILS Server Address. This is the web address of the ILS FTP server you'd like to connect with. An FTP address looks a lot like an HTTP (website) or IP address, except it uses the prefix ftp:// instead of http:// and can be any combination of letters and numbers.
- ILS FTP Path. This is the directory path (on the ILS FTP server) where Alexandria will send its data. Having the wrong FTP path is one of the most common connection errors. If you get an error message when trying to connect, be sure to check your FTP path. Default is “ / ”.
- FTP Username. The login user name used to access the ILS FTP server.
- FTP User Password. The login password used to access the ILS FTP server.