The Support Center has moved!! See the new website https://support.goalexandria.com/ ![]()

Controller Installation
Last Updated: $action.dateFormatter.formatDateTime($content.getLastModificationDate())

Installation Summary
You will need to install the Alexandria Controller on a machine you’ve designated as your server; ideally, a dedicated machine isolated from the public and only accessible for infrequent operator maintenance. Once installed, the Alexandria Controller is where you will add and configure individual library data stations; it will also facilitate access for librarians via their web browser.
Make sure that the machine on which you will be installing and running the Alexandria Controller meets the minimum recommendations for both hardware and operating system software.
Your COMPanion Sales Rep will email you the installers for your operating system.
We recommend that you save this file to your computer desktop.
- Double-click on the Alexandria Controller Installer.exe executable (Windows) or the Alexandria Controller Installer.dmg disk image (Macintosh). Follow the on-screen prompts and accept the terms of the COMPanion Corporation Electronic End User License Agreement.
- The Alexandria Controller will install to an operating system-specific directory. If one doesn’t previously exist, the installer will create a COMPanion Corporation\Alexandria Controller folder and extract the application there.
Windows: Hard Drive (typically C:) \ Program Files (x86) \ COMPanion Corporation \ Alexandria Controller
- Mac: Hard Drive \ Applications \ COMPanion Corporation \ Alexandria Controller
- All of your database information will be stored in an Alexandria Support folder located in the system shared application directory.
- Windows: Hard Drive (typically C:) \ ProgramData \ Alexandria Controller Support
- Mac: Hard Drive \ Users \ Shared \ Library \ Application Support \ Alexandria Controller Support
- After installation, the Alexandria Controller will attempt to register with your operating system as a service. Afterward, restart your computer to finalize the process. From this point on, the Controller will launch at startup and continue to run in the background.
Registration
The first time you launch the Alexandria Controller, it will bind to the very first static IP that it detects. If needed, you can modify this in your GlobalConfig.json file.
Registration is largely automatic; the Alexandria Controller Installer you downloaded includes your unique registration information in the GlobalConfig.json file stored in Alexandria’s Data folder—your Data Station just needs to connect to COMPanion servers in order to validate. If needed, your registration information can also be found on the back of your Getting Started Guide or in the confirmation email you received after licensing Alexandria. Successful registration requires a a valid Registered To name, Product Codes, Serial Number and Validation Code and click OK.
Log In
To access the Administration module, add "/admin" to the end of your Alexandria login URL.
A District Administrator-level operator with the equivalent Security Group access has already been created for you; please review your confirmation email for your login information. When prompted, enter your username and password. 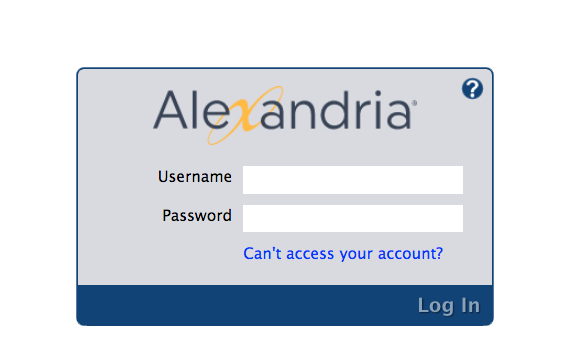
After logging in, the Controller Administrator will be able to access and modify each of your individual data station's Preferences using web browsers (Chrome, Safari, or Firefox) on mobile devices, laptops, and tablets such as Apple's iPad, Google's Chromebook, and others. The Controller's Administration settings allow you to configure settings not available elsewhere (e.g. Monitor and Settings).
Future access to Alexandria requires that each operator have their own username and password along with an appropriate Security Group to pass the security Log In window. Keep in mind that some operators may not have permission to access certain interfaces or perform some tasks.
Adding Data Stations
You are allowed to add new or import existing Alexandria Data Stations (i.e. Data folders) to be managed by the Controller.
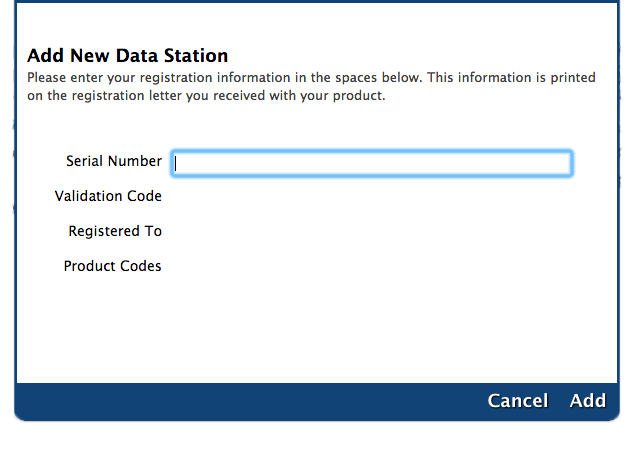 If you choose to Add a new Data Station (i.e. Data folder set) from scratch, be prepared to complete the required registration information when prompted. Attempting to add a data set who's Serial Number already matches that of a Data Station managed by the Controller will result in an error message.
Add a New Data Station
- Go to Controller Administration > Monitor > Actions menu and select Add.
- In the Add New Data Station dialog, enter your Serial Number, Validation Code, Registered To code, Product Codes.
- Click Add.
If everything is correct, the new Data Station will be added to the Controlled Data Stations list of the Monitor interface,
Add an Existing Data Folder
If you are re-adding an existing data set because you're troubleshooting an issue or you've been given a new data folder from your district and need to add it to your collection, follow these general steps. Since Controller Administration and its associated modules are completely web-based, there is no way for the interface to accept a Data Folder via drag-and-drop, nor does the interface allow you access your operating-system explore (i.e. finder) window from your web browser.
- Therefore, go to your Alexandria Controller Support directory and open Data Folders. It contains a folder for each of your controlled Data Stations by serial number.
- Create a new folder in Data Folders with the serial number of your database as the folder name (e.g. 7005787).
- Next, move your pre-existing data folder into the newly created folder named after your Data Station's serial number.
- Go to Controller Administration > Actions and select Scan Data Stations.
- After a few seconds, your Data Station will appear in the Controlled Data Stations list.
- Initially, the Data Station will appear stopped; go to Monitor > Actions > Start Selected to activate it.
Troubleshooting
If the Alexandria Controller doesn't seem to be communicating properly after installation, here are some of the most common problems that we encounter:
- Does your machine have a network filter turned on?
- Does your network have network filters turned on which are blocking Alexandria Controller communications?
- Does your network block communications outside of your network?
- Do you have a mail firewall that is blocking messages?
If you've corrected these issues and problems still exist, please contact our Customer Support team:
Phone: 1-800-347-4942
Email: support@companioncorp.com