| Content Column |
|---|
| | Content Block |
|---|
| Adding patron records to Alexandria is easy! You can either add records manually (see steps below) or import hundreds of records at once. | Note |
|---|
Operators (Library Administrator, Librarian, Student Aide, etc.) are still considered patrons. Their records are created and managed in Patrons Management, and the Security Group field is what determines their program access. See Adding Operators for more information. |
 Image Modified Image Modified
Step-by-Step Instructions Add Patron Record
Click the Image Removed Add at the bottom of the Records List pane to open a new, blank record so you can add the new patron information. Fill in all the necessary fields, drop-down menus, and checkboxes in each of the Patrons management tabs (such as first and last name, address, and so forth). Click <tab> to - Log in to Patrons Management.
- Click the Lock icon, then select the Add Patron button Image Added in the top right corner. Image Added
- A new record will appear to the right. Each field will be blank except for a few preset defaults. These defaults can be changed in the Patron Defaults tab of Patron Preferences.
- Move between the Patrons Tabs to enter information, configure options, and make changes to the patron record as needed.
- At the very least, Last Name, Barcode, and a Security Group are required to save your new patron. However, we suggest you also provide a unique Username, Password, and Email address during the creation of your patron.
- Next, if you intend to give your new patron any operator privileges (e.g. Librarian or Student Aide), select the correct Security Group from the drop-down menu. You will also need to use the Site Access selection to mark the sites that your patron is permitted to access. Otherwise, leave these selections alone.
- Click Save to add your new patron record or Revert to discard it.
| Tip |
|---|
While filling out a patron record, you can <tab> to move to the next field, or <shift-tab> to move to the previous field. |
Usernames and Passwords- Usernames must be unique. If the username you've selected is already in use, Alexandria will ask you to choose another.
- A patron's default password is their last name.
- Passwords are not case-sensitive.
- Patrons are saved to the database by username and barcode, so they can have duplicate first/last names and security groups.
Other- Alexandria automatically assigns a barcode number based on the value you've provided in the Next Barcode field of the Patron Defaults preferences.
- We suggest administering a user-defined Policy and Status. Assigning the correct patron policy is important when certain patron groups need to stand apart in statistical reporting.
- You can quickly import hundreds of patrons if you have their data in a tab-delimited format.
You can edit patron information directly from Patrons Management. Before records can be changed, they must be unlocked by clicking on the Lock button  Image Added. Image Added. This method for modifying information is best when editing an individual patron record. If you want to modify information for a group of patrons, use Patron Utilities. Step-by-Step InstructionsModify Patron Records- Log in to Patrons Management.
- Use quick search or Advanced Search
 Image Added to look up a patron. Image Added to look up a patron. - Enter information about the patron (e.g. Last Name, Barcode, etc.) and press <return> or <enter>.
- Select the patron you'd like to modify.
- Unlock the patron's record by clicking the Lock button Image Added.
- Now you may move between the Patrons Tabs, making changes to the patron record as needed.
- Keyboard: To move to the next blank data entry field,
or press <shift-tab> to - press the <tab> key. To move to the previous blank data entry field, press <shift-tab> or <-tab>. To select a particular data entry field to edit, click in the field. To select from a drop-down menu, <tab> until the drop-down menu you desire is highlighted and use the <up> and <down> arrow keys to make your selection.
- If needed, use the Password and Confirm Password fields to change the patron's password. You can make passwords more secure by mixing different types of characters, numbers, and even special characters such as “&” or “%”. Alexandria passwords are not case sensitive, so using upper and lower case letters is unnecessary.
- Once you have modified all the necessary information for this patron, click the Save button in the upper-right corner. If you want to ignore the information you have entered, click the Revert button. You won't be able to select another patron record until you Revert or Save your changes.
- If you try to save a patron record with a Username or Barcode that is already in use (e.g., eanderson or 1001), an error message will appear, prohibiting the change.
| Expand |
|---|
| title | Click to view the old interface |
|---|
| Add Patron RecordAdding patron records to Alexandria is easy! You can either add records manually (see steps below) or import hundreds of records at once. | Note |
|---|
Operators (Library Administrator, Librarian, Student Aide, etc.) are still considered patrons. Their records are created and managed in Patrons Management, and the Security Group field is what determines their program access. See Adding Operators for more information. |
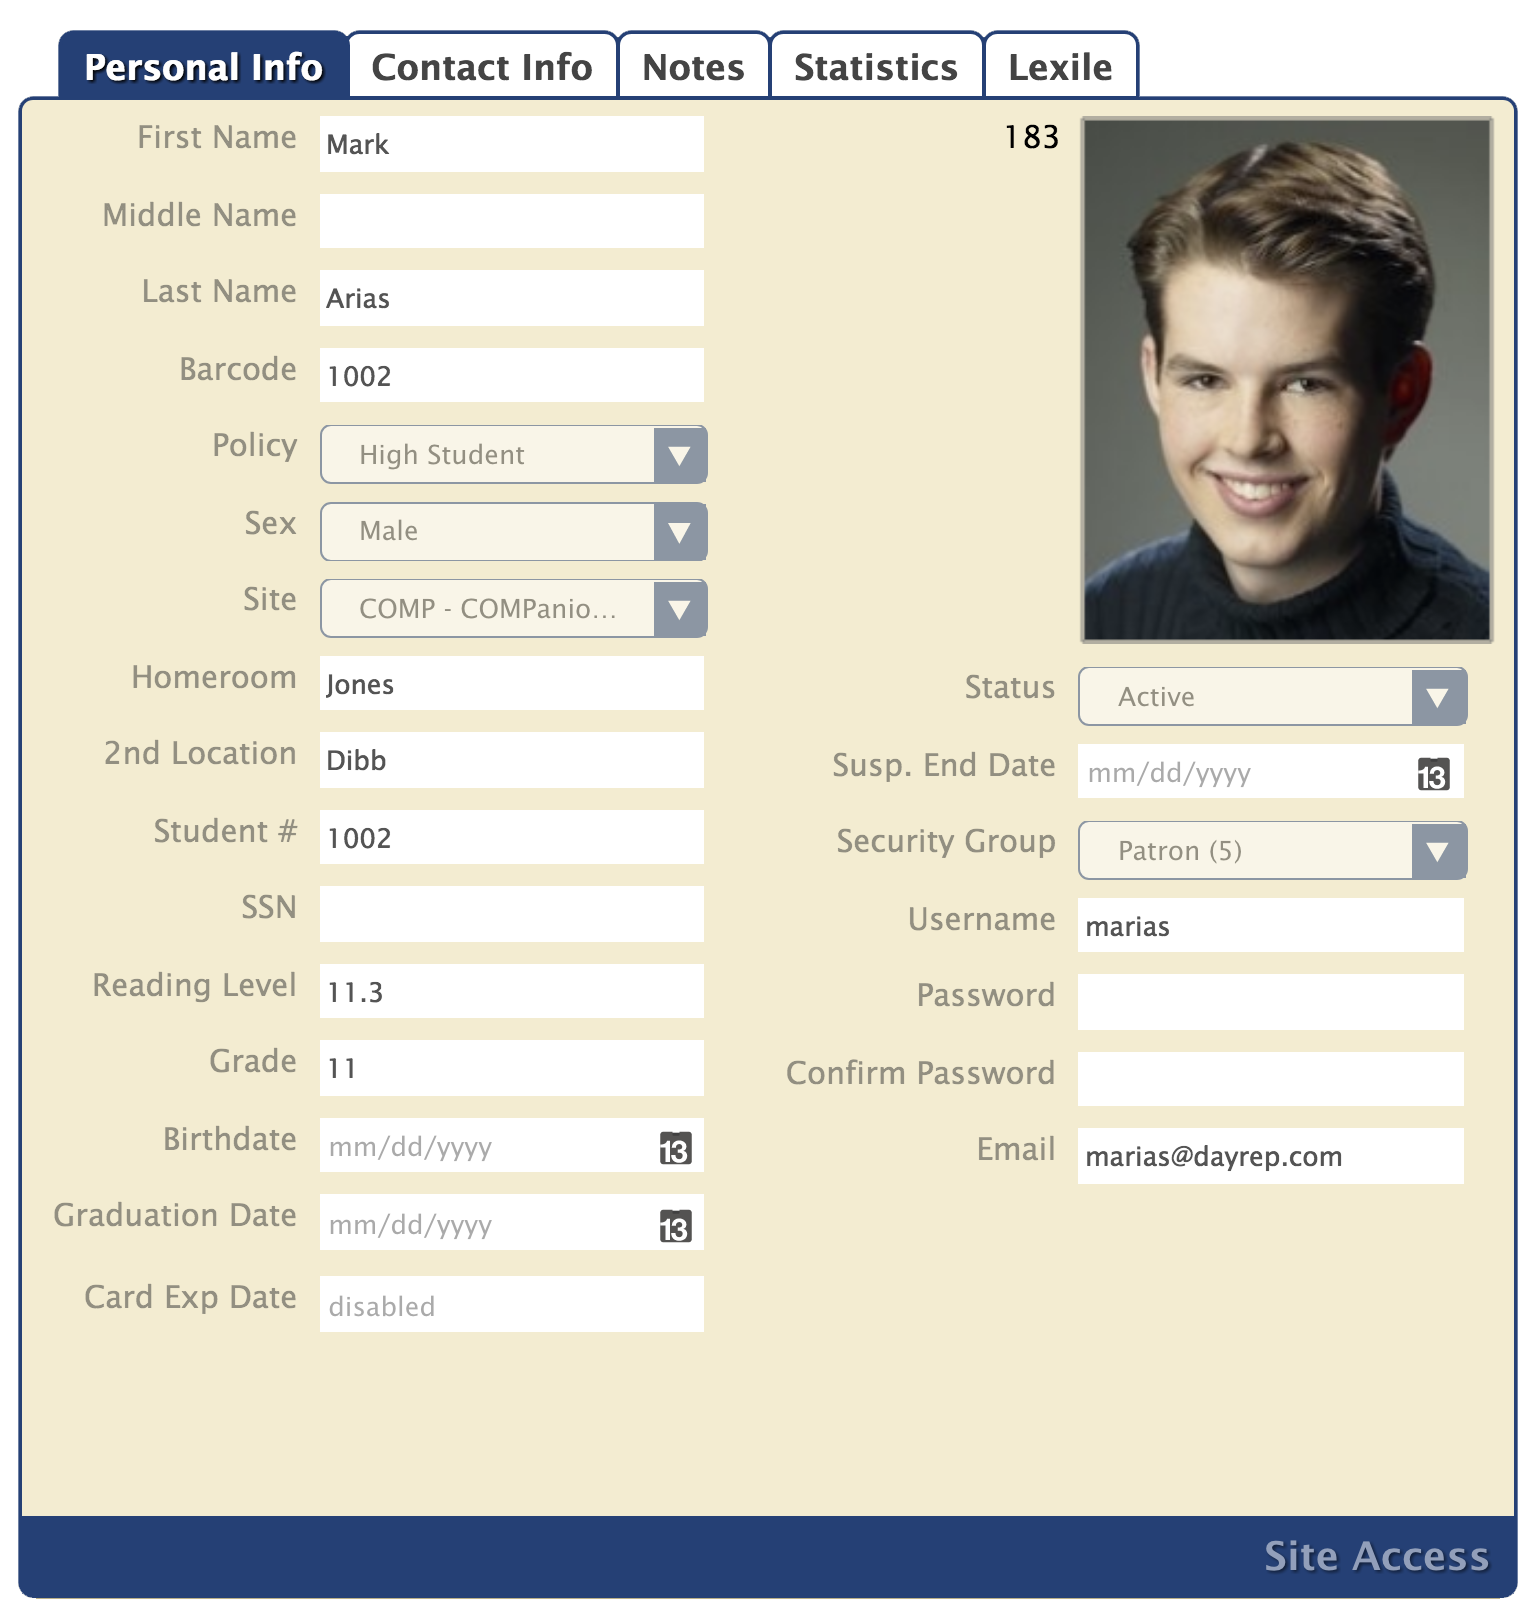 Image Added Image Added
Step-by-Step InstructionsAdd |
PatronsPatron Record- Log in to the Patrons Management module.
- Click the Add Patron
|
button - button
 Image Added located near the bottom of Image Added located near the bottom of
|
the patrons to add a new patron record to your database.The Patrons management module will be cleared of all but your default values, some of which are required in order to save your new patron- .
- A new record will appear to the right. Each field will be blank except for a few preset defaults. These defaults can be changed in the Patron Defaults tab of Patron Preferences.
- Move between the Personal Info, Contact Info,
|
, Statistics, and Lexile tabs, providing - tabs to enter information,
|
configuring making - make changes to the patron record as needed.
- At the very least, Last Name, Barcode, and a Security Group are required to save your new patron. However, we suggest you also provide a unique Username, Password, and
|
contact - Email address during the creation of your
|
patron.Additionally, you can use the drop-down menus to supply the new 's Policy, Status, and SexUse the Notes tab to add any special patron alert notes.- Next, if you intend to give your new patron any operator privileges (e.g.
|
Student - Librarian or Student Aide), select the correct Security Group from the drop-down menu. You will also need to use the Site Access selection to mark the sites that your patron is permitted to access. Otherwise, leave
|
this selection - these selections alone.
- Click Save to add your new patron record or Revert to discard
|
them.Special Considerations- it.
| Tip |
|---|
While filling out a patron record, click <tab> to move to the next blank data entry field, or press <shift-tab> to move to the previous blank data entry field. |
Usernames and Passwords- Usernames must be unique. If the username you've selected is already in use, Alexandria will ask you to choose another.
- A patron's default password is their last name.
- Passwords are not case-sensitive.
|
Operators and patrons - Patrons are saved to the database by username and barcode, so they can have duplicate first/last names and security groups.
|
The only required fields are Barcode and Last Name; however, we highly recommend you enter a unique username, email address, and security group (other than Patron) for each new operator.Other- Alexandria automatically assigns a barcode number based on the value you've provided in the Next Barcode field of the Patron Defaults preferences
|
.Most patrons won't need to have their Site Access indicated; however, if you intend to give your new patron any sort of operator or library management privileges (e.g. Student Aide), use the Site Access selection to mark the sites that your patron is permitted to accessYou can quickly import hundreds - We suggest administering a user-defined Policy and Status. Assigning the correct patron policy is important when certain patron groups need to stand apart in statistical reporting.
|
- By default, newly created patrons (i.e normal library patrons and not operators) are assigned the Patron Security Group level; this level doesn't allow any access to the Data Station or management-side of the program.
- You can quickly import hundreds of patrons if you have their data in
|
electronic If you would like to add a patron's picture at this time, you can upload a JPEG, GIF, PNG, or BMP (or any other image format that your browser supports) using the Browse for Patron Picture selection from the primary Actions menu of Patrons Management. Alternatively, you may drag the patron picture from your operating system desktop into the picture field of the Patron Management window's Personal Info tab. Larger images will be auto-sized and shrunk (or stretched) to fit the 240 x 186 pixel specifications if they're revealed to be too large (or small). Either way you choose, the patron picture should now appear in the right-hand area of the Personal Info tab.
Modify Patron RecordYou can edit patron information directly from the Patrons Management module. Before records can be changed, they must be unlocked by clicking on the Lock button Image Added. This method for modifying information is best when editing an individual patron record. If you want to modify information for a group of patrons, use the appropriate Patron Utilities. Step-by-Step InstructionsModify Patron Records- Log in to the Patrons Management module.
- In the bottom left corner, click on the Find icon Image Added to pull up the Patron Lookup dialog.
- Enter qualifying information about the patron (e.g. Last Name, Barcode, etc.) and click Search (or press <enter>).
- If results—multiple or exact—are located for your search, the Records List pane (on the left) will be populated with the patron record(s) that most closely match your criteria.
- Select (highlight) the patron you'd like to modify.
- Unlock the patron's record by clicking the Lock button Image Added.
- Now you may move between the Personal Info, Contact Info, Notes, Statistics, and Lexile tabs, making changes to the patron record as needed. To move to the next blank data entry field, press the <tab> key. To move to the previous blank data entry field, press <shift-tab> or <-tab>. To select a particular data entry field to edit, click in the field. To select from a drop-down menu, <tab> until the drop-down menu you desire is highlighted and use the <up> and <down> arrow keys to make your selection.
- If needed, use the Password and Confirm Password fields to change the patron's password. You can make passwords more secure by mixing different types of characters; use some uppercase letters along with lowercase letters, numbers, and even special characters such as “&” or “%”.
- Once you have modified
|
Once you have provided - all the necessary information for this patron, click the Save button in the upper-right corner
|
of the Patrons management module- . If you want to ignore the information you have entered, click the Revert button
|
and the previous patron or patron will be displayed. Clicking Save button causes the new patron to appear in the patrons Records List pane of the Patrons management module.- . You won't be able to select another patron record until you Revert or Save your changes.
- If you try to save a patron record with a Username or Barcode that is already in use (e.g., eanderson or 1001), an error message will appear, prohibiting the change.
|
Back to Top |
|
|
