| Content Column |
|---|
| | Content Block |
|---|
| Catalog an eBook- In Items Management, click on the plus icon
 Image Added to add a new title. Image Added to add a new title. - Choose how you want to add the eBook:
- To
Use the Title Assistant to add an eBook to your collection just as you would for their paper and ink counterparts. If you - find a MARC record match
using the Title Assistant, but - , use Title Assistant. Click on the appropriate record to highlight it before clicking Continue or pressing <enter>. If the Medium is not “electronic resource” or “downloadable eBook”, remember that you can later change the Medium and Policy and add any additional information (e.g. notes) required to perfect your eBook record.
Once you’ve located a suitable record, double-click on it or select (highlight) the record and press <enter> (or click the Continue button); this populates a new (unlocked for further editing) title record in Items Management with the contents of the selected record in either Item View or MARC View (the default view for which you've selected to add a new title). - Or, to add a record manually, Skip the Title Assistant.
- The new title record will appear in the record pane, where you can add or modify any information about the eBook. Here are some fields you should review:
- Call Number. Make the Call Number easily identifiable as a title that is (or can be) downloaded to an eReader. For example, if you were cataloging The Cat in the Hat by Dr. Seuss, you may want to add the prefix of KIN to the Call Number in order to designate it as an eBook title installed on a Kindle. Then, complete the call number as if you were cataloging a regular book (e.g. KIN CL SEU).
- Policy. Select your eBook policy. You'll want to review it in your Policy Preferences to make sure it's configured correctly. Specifically, check the following:
- On the Check Out tab, make sure that the Transaction Period drop-down menu is set to No Loan Period.
- On the Other tab, make sure the Allow Hold Requests option is unchecked.
- On the Other tab, verify that Show AS ONLINE in Researcher is checked.
- Medium. If necessary, change the Medium (245_h) to something like “electronic resource” or “downloadable eBook”.
- Subjects tab. Create a convenient link to the eReader group on which the eBook was downloaded/installed by using the title of the eReader group as a subject heading. See Add eReader Group as Subject Heading.
- When you're done customizing the record, click Save.
Site-specific eBook URLsFor centralized catalogs only. To make only your eBooks show up in your search: Navigate to the title in Items Management and switch to MARC View. Find the 856 tag for electronic resources. This should already have your link (_u) and link text (_y). Add another subfield to the 856 for _8. In this field, put your site code e.g. EVE. An invalid site code could cause this item to not show up at all so make sure you get this right. if you have multiple URLs for your different sites, make sure there is an entry for each url. if you want this e-resource to show up at multiple sites, simply create an 852 tag for each site (be sure there is a _u and _y in addition to the _8). Note that _9 can also be used for the site code but we recommend _8. Talk to your vendors about including an 856 _8 for your site in their import files. Otherwise, you will need to do this for all new e-resource items. A title with 856 _8 or _9 ‘copies’ will ONLY show for the site you are searching; this applies in patron interfaces as well as in Items Management. These ‘copies’ will not count toward your license limits.
Optional Strategies Here are some extras things you can do with your eBooks and electronic resources. Add eBook CopiesGenerally, we don't recommend adding copies for eBooks and electronic resources. This is because it gives patrons the wrong impression on how to access those items, is often considered incorrect cataloging (since there aren't actual copies), and it may contribute to your item limits. However, you might choose to add eBook copies if you want to track usage or have digital copies that can only be loaned to one person at a time. If you want to add copies to your eBooks, first follow the instructions to Catalog an eBook. After you click Save, a dialog will pop up asking if you want to add a copy. Clicking Add will create a new, blank copy in the record pane. Fill out the copy's information and click Save. You can add more copies by clicking on the Actions menu  Image Added and selecting Add Copy (adds one new copy) or Duplicate Copy (adds multiple new copies). Image Added and selecting Add Copy (adds one new copy) or Duplicate Copy (adds multiple new copies). Add eReader Group as Subject HeadingCreate a convenient link to the eReader group on which the eBook was downloaded/installed by using the title of the eReader group as a subject heading. This way, patrons will be able to see the eReader group for an eBook by looking at its expanded details in Search or Explore's results. - Go to Items Management and select the eBook record.
- Click on the Subjects tab.
- At the top of the window, click the padlock icon to unlock
 Image Added the record for editing. Image Added the record for editing. - Click Add and select 650 - Subject Added Entry - Topical Term.
- In the 650_a field, type the eReader group name (e.g. "Kindle Group 1"). This should exactly match the title of the record for the eReader(s) on which this particular eBook is installed.
- At the bottom of the window, click Save to keep the tag.
- Save the record at the top) to keep your subject heading changes or Revert to abandon them.
Visit the Library of Congress for more information about 650 - Subject Added Entry - Topical Term tags. Create an eBook Barcode Reference SheetIf you have eBook copies, run a Copy Labels (3x10) report to create a printable quick reference for all the eBooks in your collection. These are easy to use, distribute, and share at your organization! - Go to Operations > Reports > Copies > Labels.
- Select Copy Labels (3x10) – Barcode Labels, Envelope Labels, Info Labels.
Configure the Selections tab as shown below: | Expand |
|---|
| 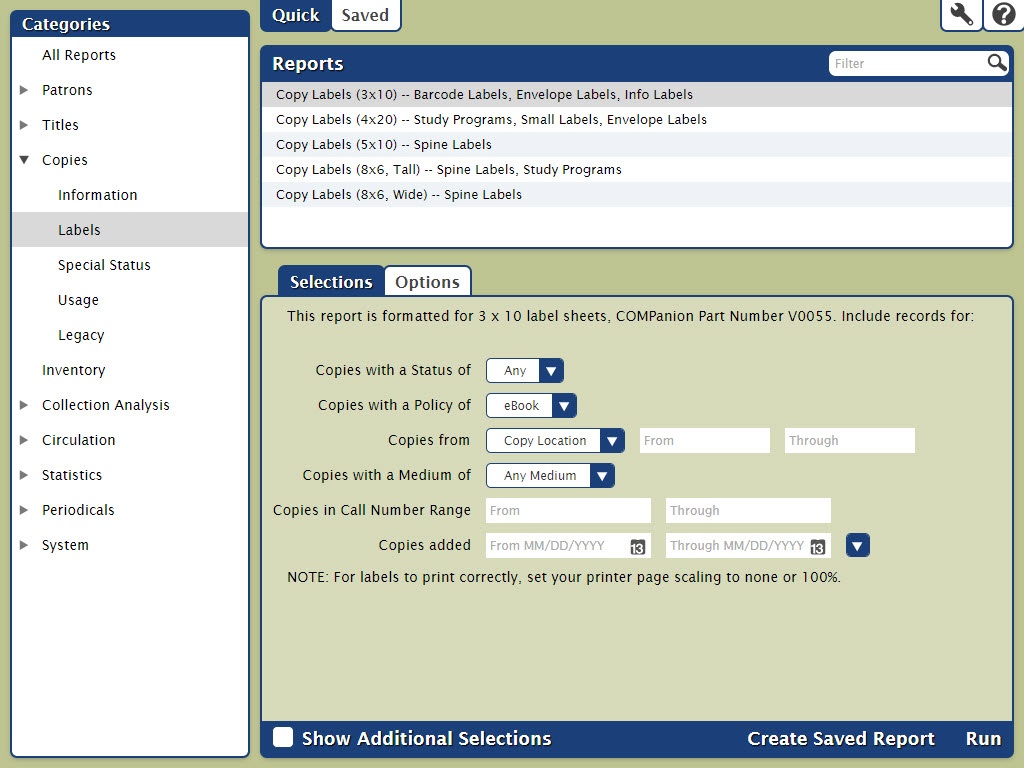 Image Added Image Added
|
Click on the Options tab. Click the Sort By dropdown menu and select Title. | Expand |
|---|
| 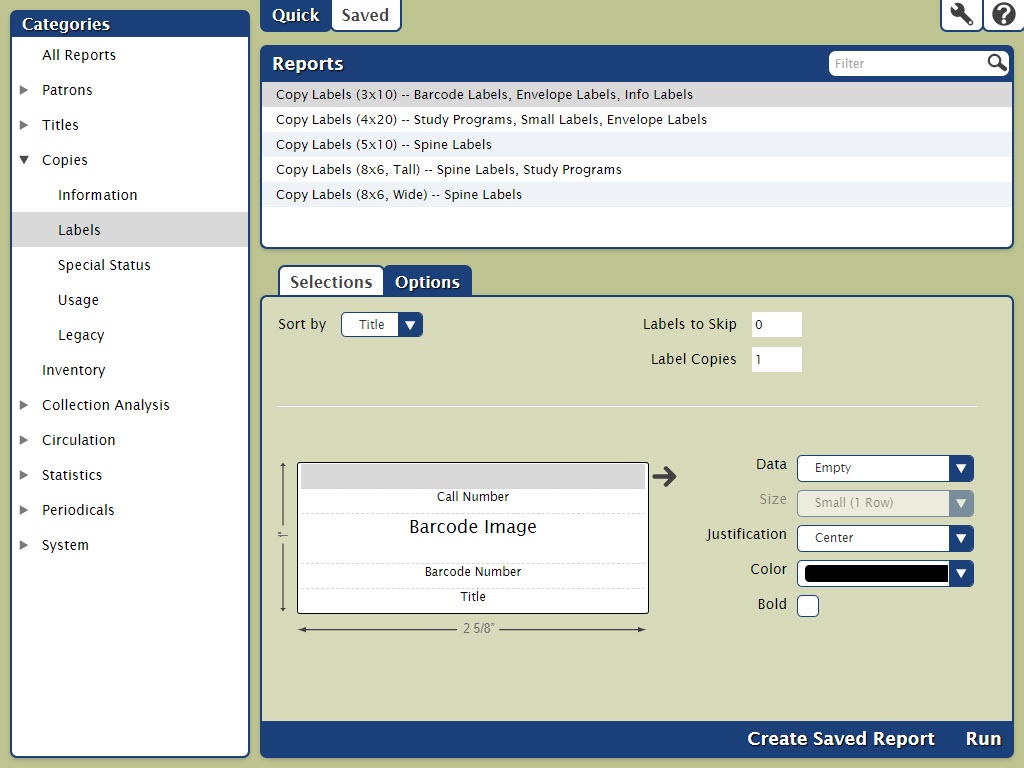 Image Added Image Added
|
Click the Run button at the bottom of the window. Next, click the  Image Added Operations icon in the top right of the Reports window, or go to Operations from your sidenav. Image Added Operations icon in the top right of the Reports window, or go to Operations from your sidenav. Locate your report, which should be at the top of the list, and then click the PDF icon to download it to your device. | Expand |
|---|
| Image Added |
Print the PDF and keep a hard copy at your circulation desk so it is readily accessible for reference.
| Tip |
|---|
Make this a Saved report and mark it as a Favorite so you don't have to remember how to set it up again the next time you add more eBook titles. |
| Expand |
|---|
| title | Click here to see old interface... |
|---|
| Catalog an eBook- In Items Management, select the Titles tab.
- At the bottom left of the Records List pane, click on the plus icon
 Image Added to add a new title. Image Added to add a new title. - Choose how you want to add the eBook:
- To find a MARC record match, use Title Assistant. Click on the appropriate record to highlight it before clicking Continue or pressing <enter>. If the Medium is not “electronic resource” or “downloadable eBook”, remember that you can later change the Medium and Policy and add any additional information (e.g. notes) required to perfect your eBook record.
- Or, to add a record manually, click Search or press <enter>.
- The new title record will appear in the record pane, where you can add or modify any information about the eBook. Here are some fields you should review:
- Call Number. Make the Call Number
|
One of the first things you should do is modify the new eBook record's Call Number to make it - easily identifiable as a title that is (or can be) downloaded to an eReader. For example, if you were
|
cataloging The - cataloging The Cat in the
|
Hat by - Hat by Dr. Seuss, you may want to add the prefix of KIN to the Call Number in order to designate it as an eBook title installed on a Kindle
|
; then - . Then, complete the call number as if you were cataloging a regular book (e.g. KIN CL SEU).
|
Next, select the eBook policy from the corresponding Policy drop-down menu- Policy. Select your eBook policy. You'll want to review
|
your Policies Preferences to theyre - s configured correctly. Specifically, check the following:
|
Make - On the Check Out tab, make sure that
|
the Transaction Period drop- the Transaction Period drop-down
|
menu under the Check Out tab is set to No - menu is set to No Loan Period.
- On
|
the Other tab the Allow Hold Requests option is not checked.Verify that Show - the Allow Hold Requests option is unchecked.
- On the Other tab, verify that Show AS ONLINE in
|
Researcher is checked under the Other tab- Researcher is checked.
- Medium. If necessary
|
, back at the Items Management window- , change the Medium (245_h)
|
in the Publication subtab - to something like “electronic resource” or “downloadable eBook”.
|
Next, create - Subjects tab. Create a convenient link to the eReader group on which the eBook was downloaded/installed by using the title of the eReader group as a subject heading
|
.Finally, click Save. When you are asked if you would like to add a copy, click Yes. This creates a new, blank (unlocked for further editing) copy in the Items Management window. Click Save again to keep the copy. Even though an eBook has no physical manifestation in which to attach a barcode label, you can still use use the barcode to gather usage statistics for the eBook- . See Add eReader Group as Subject Heading.
- When you're done customizing the record, click Save.
Optional StrategiesHere are some extras things you can do with your eBooks and electronic resources. Add eBook CopiesGenerally, we don't recommend adding copies for eBooks and electronic resources. This is because it gives patrons the wrong impression on how to access those items, is often considered incorrect cataloging (since there aren't actual copies), and it may contribute to your item limits. However, you might choose to add eBook copies if you want to track usage or have digital copies that can only be loaned to one person at a time. If you want to add copies to your eBooks, first follow the instructions to Catalog an eBook. After you click Save, a dialog will pop up asking if you want to add a copy. Clicking Add will create a new, blank copy in the record pane. Fill out the copy's information and click Save. You can add more copies by clicking on the Actions menu Image Added and selecting Add Copy (adds one new copy) or Duplicate Copy (adds multiple new copies). Add eReader Group as Subject Heading |
To add Create a convenient link to the eReader group on which the eBook was downloaded/installed by using the title of |
an the eReader group as a subject heading |
:. This way, patrons will be able to see the eReader group for an eBook by looking at its expanded details in Search or Explore's results. - Go to Items Management and select the eBook record.
- Click on the Subjects tab.
- At the top of the window, click the padlock icon to unlock
|
the - Image Added the record for editing.
|
Select the 650 tag you wish to edit, then click Edit.Enter an appropriate subject heading tag. For example, you can - Click Add and select 650 - Subject Added Entry - Topical Term
|
and then enter Kindle Group 1 into the subfield, since this is the title - field, type the eReader group name (e.g. "Kindle Group 1"). This should exactly match the title of the record for the eReader(s) on which this particular eBook is installed.
|
When you're finished, click - At the bottom of the window, click OK.
- Click Save to keep your subject heading changes or Revert to abandon them.
Visit the Library of Congress for more information about 650 - Subject Added Entry - Topical Term tags. |
Run a Copy Barcode Labels ReportNext, run a barcode label report to create a printable quick reference for all the eBooks in your collection. These are easy to use, distribute, and share at your organization! |
| Multiexcerpt include |
|---|
- Go to Tools > Reports > Copies > Labels.
- Select Copy Labels (3x10) – Barcode Labels, Envelope Labels, Info Labels.
Configure the Selections tab as shown below: | Expand |
|---|
| Image Added |
Click on the Options tab. Click the Sort By dropdown menu and select Title. | Expand |
|---|
| Image Added |
Click the Run button at the bottom of the window. Next, click the Image Added Operations icon in the top right of your window. Locate your report, which should be at the top of the list, and then click the PDF icon to download it to your device. | Expand |
|---|
| 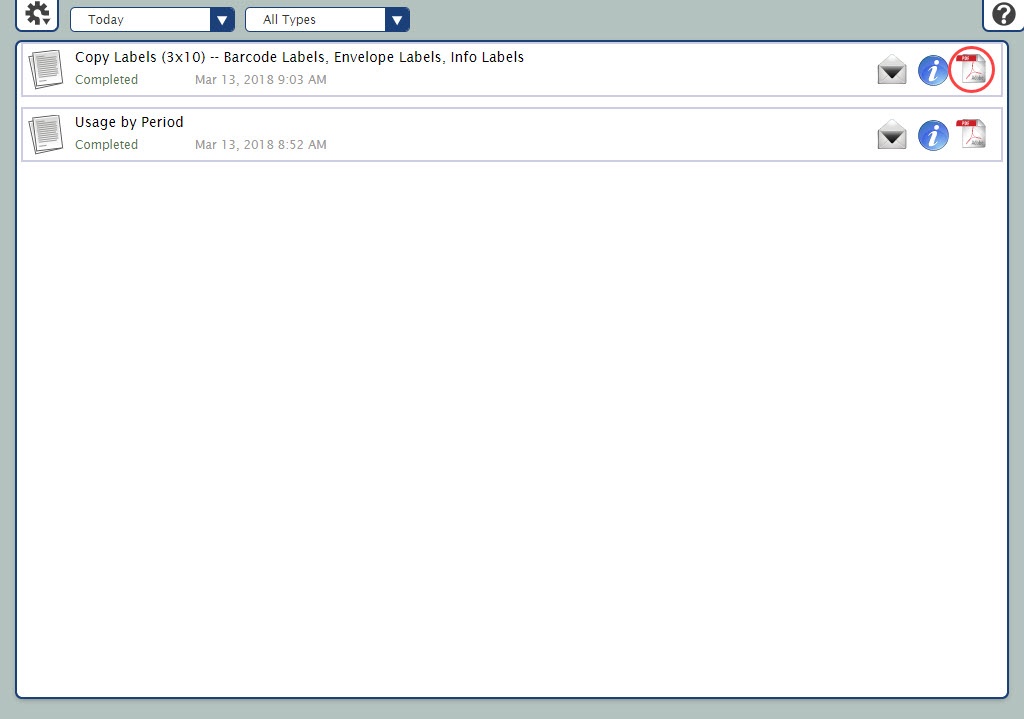 Image Added Image Added
|
Print the PDF and keep a hard copy at your circulation desk so it is readily accessible for reference.
| Tip |
|---|
Make this a Saved report and mark it as a Favorite so you don't have to remember how to set it up again the next time you add more eBook titles. |
|
| MultiExcerptName | Run a Copy Barcode Labels Report |
|---|
PageWithExcerpt | ALIB:Alex Steps Items |
|
|
